您需要 登录 才可以下载或查看,没有账号?注册

x

Introduction
My name is Abderrezak Bouhedda and I am currently working as a Material & Shader Artist at Stellar Entertainment Software.
I have been selling Substance tutorials & tools since 2018 on Gumroad.
介绍
我的名字是Abderrezak Bouhedda,我目前在Stellar Entertainment Software担任Material & Shader Artist。
自2018年以来,我一直在Gumroad上销售Substance教程和工具。

First step
First of all, before you do anything or even start the Substance .exe You need to collect some references on what you’re willing to create, Information & Shape reading is ultimately important stage when it comes to creating any kind of work, props, environments, characters, materials. You can’t make food without a recipe, right? References are the recipe of your craft, so here’s an example.
第一步
首先,在你做任何事情,甚至在开始物质.exe之前,你需要收集一些关于你愿意创造的东西的参考资料,信息与形状阅读在创造任何类型的作品,道具,环境,角色,材料时最终都是重要的阶段。没有食谱,你无法制作食物,对吧?参考文献是您工艺的秘诀,所以这里有一个例子。
I didn’t just collect random references, Most important thing you need in references is a reference from an angle that shows how reflection/roughness/specular is being affected by the light, one or more references that show how big/small is that material, scale-wise it varies and we can deal with that in SD but a scale reference helps a lot, especially in production.
我不只是收集随机参考,在参考中你需要的最重要的东西是从一个角度的参考,显示反射/粗糙度/镜面反射如何受到光线的影响,一个或多个参考显示该材料的大小,比例方面它的变化,我们可以在SD中处理它,但比例参考有很大帮助, 特别是在生产中。
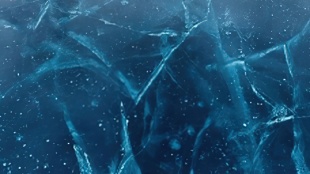
You read the shapes and imagine them basic without warping, like a simple sketch or you can draw over them straight lines so you could have an idea of which nodes to use first. Otherwise, you’ll get used to it and be able to read shapes easily from refs and determine which nodes to use first, It’s pretty clear here that they look like cracks with long nearly-straight lines on top of the cracks.
您可以阅读形状并想象它们的基本形状而不会翘曲,就像一个简单的草图,或者您可以在它们上面绘制直线,以便您可以知道首先使用哪些节点。否则,您将习惯它,并能够轻松地从refs中读取形状并确定首先使用哪些节点,这里很明显,它们看起来像裂缝,在裂缝顶部有长长的近乎直线。
Creating The Initial Shapes
A quick start/sketch with the Cracks generator that I did create before, you can create your own or just use cells, mask a few of the bigger cells and put more cells on them. We can use the potential of Flood Fill nodes, to give our cells random value variations and gradients, which are the resources we need later for the colour maps, details and more.
创建初始形状
使用我之前创建的裂缝生成器快速启动/草图,您可以创建自己的单元格或仅使用单元格,掩盖一些较大的单元格并在其上放置更多单元格。我们可以利用 Flood Fill 节点的潜力,为单元格提供随机值变化和渐变,这是我们以后需要的资源,用于色彩映射表、细节等。
Here’s a quick look at the Scratches Generator Node (which comes with Substance Designer).
Create the scratches and put them aside for use later, we’ll blend them with the cracks later.
下面快速浏览一下划痕生成器节点(随 Substance Designer 一起提供)。
创建划痕并将它们放在一边供以后使用,我们稍后将它们与裂缝混合。
After that, the cracks can be done with any crack nodes, either you create your own cracks or grab one of the free crack generators which there are plenty out there in Substance Share or anywhere on the internet. I preferred to create mine and set outputs that I usually need.
之后,裂缝可以用任何裂缝节点完成,要么创建自己的裂缝,要么抓住一个免费的裂缝生成器,这在Substance Share或互联网上的任何地方都有很多。我更喜欢创建我的输出并设置我通常需要的输出。
Output for Cracks with damage on the edges, one for flood fill crack cells and one for edges without damage.
输出边缘有损伤的裂纹,一个输出用于泛洪填充裂纹单元,一个输出无损伤的边缘。
After warping the cracks using Multi-Directional Warp Node, mode Average, 2 directions with Clouds 2. We proceed to blend using Screen Mode, both cracks & scratches into one map.
翘曲后使用多向翘曲节点,模式平均,2方向与云2。我们继续使用屏幕模式混合,将裂缝和划痕混合成一张地图。
Deep Frost Creation
As the graph is a little bit big, with many details, I’ll cover the most important things so the article isn’t boring to read & learn from. The depth is going to be used later as a translucency map, in the colour map, as a separate map to use later maybe for UE’s bump offset or parallax offset for shader purposes depending on your needs.
深霜创造
由于图表有点大,有很多细节,我将介绍最重要的事情,这样这篇文章就不会无聊地阅读和学习。深度稍后将用作半透明贴图,在色彩映射表中,作为单独的贴图,以后可能会用于UE的凹凸偏移或视差偏移,用于着色器目的,具体取决于您的需要。
The blended previous result we run it into Multi-Directional Warp node again, with Clouds 2 for the sake of intersecting crack edges
混合了上一个结果,我们再次将其运行到多向翘曲节点中,使用Clouds 2,以便与裂缝边缘相交
After that, we create two Non-Uniform Blur nodes (in deep frost frames), as the settings are shown. The second one is just different from the first one by the Angle.
之后,我们创建两个非均匀模糊节点(在深霜帧中),如所示设置所示。第二个与第一个不同于Angle。
The Non-Uniform Directional Warp node, middle one. Is used for depth colour later. It takes input from the previous Multi-Directional Warp.
非均匀定向翘曲节点,中间一个。稍后用于深度着色。它接受上一个多向翘曲的输入。
After that, we blend both Deep Frost results (non-uniform blur nodes) with Screen mode opacity 1.
之后,我们将深霜效果(非均匀模糊节点)与屏幕模式不透明度 1 混合。
Here I’ll just put a Video/GIF of the next process which is very simple, taking the previous results, making variations of them, one with slope blur, one blurred, one blended with a noise map, then we keep blending results by the previous (SCREEN BLENDING MODE).
We can also use crack edges from the Initial shapes and blend them with a Perlin noise to add variations to the edges instead of blending them later as a uniform edge with the same values.
在这里,我将只放置下一个过程的视频/ GIF,这非常简单,采用以前的结果,对它们进行变体,一个带有坡度模糊,一个模糊,一个与噪声贴图混合,然后我们继续通过上一个(屏幕混合模式)混合结果。
我们还可以使用初始形状的裂纹边缘,并用柏林噪声混合它们,以向边缘添加变化,而不是稍后将它们混合为具有相同值的均匀边缘。
Colour Map & Details
The previous stuff we did, run it into a gradient map with 4 colours, the reason I did this is I keep this gradient, and any change I need to do I’ll work backwards, which means I go back to previous nodes and add/reduce values of cracks, add details to the blend nodes. The brighter the value the more it shifts to white and the darker the more it shifts to dark blue.
彩色地图和细节
我们之前做过的事情,把它运行到一个有4种颜色的渐变贴图中,我这样做的原因是我保留了这个渐变,我需要做的任何更改我都会向后工作,这意味着我回到以前的节点并添加/减少裂缝的值,向混合节点添加细节。值越亮,它向白色移动的次数越多,向深蓝色偏移的深度越深。
Now we have the large values of the colour map, we need to add the micro & mid details to pop out the realism.
Before we do that let’s have a quick look at how I did create the details for the normal map & height.
So basically we have this to start from (gradient flood fill with no edges) which is you can create like this (a bonus tip).
现在我们有了色彩映射表的大值,我们需要添加微中细节来突出真实感。
在我们这样做之前,让我们快速了解一下我是如何为法线地图和高度创建细节的。
所以基本上我们有这个开始(没有边缘的渐变泛洪填充),你可以像这样创建(一个额外的提示)。
I’m going to demonstrate the detailing phase on the normal map and how it changes, nothing fancy here, just blending the scratches, dirt node 1, grunge map 4 and the crack edges from the multi-directional warp until we get a final satisfying detailed normal/height map.
That doesn’t mean you’ll directly make it, just add stuff that you see it works similarly to the reference.
我将演示法线图上的细节设计阶段以及它是如何变化的,这里没有什么花哨的,只是混合划痕,污垢节点1,垃圾贴图4和多向翘曲的裂缝边缘,直到我们得到一个最终令人满意的详细法线/高度图。
这并不意味着你会直接制作它,只需添加你看到它与引用类似的东西。
Now the exciting part, detailing the colour map we start by creating a map that is very similar to the curvature map, but darker values will give us more dirt/dust or white values which means this map will be used in the Ambient Occlusion input of the Dirt node. By then, the scratches, dents, spots and damaged areas will have a white ice look.
We start by Normal map, grab the two Curvature nodes (Curvature smooth, Curvature Sobel) blend them together using Add Sub mode, opacity 0.13 or the value that gives lower contrast look which works like sharpening the curvature smooth by the curvature Sobel.
现在是令人兴奋的部分,详细介绍颜色图,我们从创建一个与曲率贴图非常相似的贴图开始,但较暗的值会给我们更多的污垢/灰尘或白色值,这意味着该贴图将用于Dirt节点的环境光遮蔽输入。到那时,划痕,凹痕,斑点和受损区域将具有白色的冰外观。
我们从法线贴图开始,抓住两个曲率节点(曲率平滑,曲率Sobel)使用添加子模式将它们混合在一起,不透明度0.13或提供较低对比度外观的值,其工作原理类似于通过曲率Sobel锐化曲率平滑。
Here we have a detail map for our colour map, the dirt node result will be used to colour the albedo later.
在这里,我们有一个颜色图的详细地图,污垢节点结果将用于稍后着色反照率。
Then sprinkle some spots on top using clouds 1 (selecting only a few brighter values in the histogram) then run it into a gradient, the gradient will be blended with the colour map with a mask to apply the details.
然后使用云1(在直方图中仅选择几个较亮的值)在顶部撒上一些斑点,然后将其运行到渐变中,渐变将与带有蒙版的色彩映射表混合以应用细节。
No fancy things in this step here, just the previous main gradient, blend with a dark blue colour, then blending the details with a mask (I added cracks to the mask a little bit, to get more brightness & fade in the cracks) and TADAA, now just some polishing, adding some depth & fake frost to the colour map, we can separate those later if we need to use them on different shades as well.
这一步没有花哨的东西,只是之前的主要渐变,与深蓝色混合,然后用蒙版混合细节(我在蒙版上添加了一点点裂缝,以获得更多的亮度和在裂缝中褪色)和TADAA,现在只是一些抛光,在色图上添加一些深度和假霜, 如果我们需要在不同的色调上使用它们,我们可以稍后将它们分开。
The last thing is blending the inner frost which is a bunch of warps & cells blending but the general idea of it is you can use the previous nonuniform blur results and blend them with noise maps, mask them with some cells from the flood fill, etc.
Which is the mask here.
最后一件事是混合内部霜,这是一堆翘曲和细胞混合,但它的一般想法是,你可以使用以前的不均匀的模糊结果,并用噪声图混合它们,用洪水填充中的一些细胞遮罩它们,等等
。
Then if you’d like to do some colour corrections as well, use the HSL node, levels or anything that helps you correct the overall colour map.
然后,如果您还想进行一些颜色校正,请使用HSL节点,级别或任何可以帮助您更正整体色彩映射表的内容。
Roughness Map & Translucency
粗糙度图和半透明性
Basically here it’s the dirt node map, with histogram correction to clamp or set minimum limits of the darker/gloss values to not make it 100% glossy just about 88% glossy instead. Added some damage spots to make the damage spots rough.
基本上,这里是污垢节点图,带有直方图校正,以钳夹或设置较暗/光泽度值的最小限制,使其100%光泽度仅为88%左右。添加了一些伤害点,使伤害点变得粗糙。
The translucency is pretty simple, I did desaturate the colour map, then levels to select only the brighter & mid bright areas.
半透明性非常简单,我确实降低了色图的饱和度,然后水平只选择更亮和中等明亮的区域。
Here’s a good example of using the translucency map in Marmoset Toolbag, using just a single point light, it makes the light spread on the cracks & deep frost spots.
这是在Marmoset Toolbag中使用半透明贴图的一个很好的例子,仅使用单个点光源,它就可以使光线在裂缝和深霜点上传播。
Final Results
最终结果
Sorry I didn’t explain everything in detail cause I missed some stuff that takes more than paragraphs to explain, so I left you all the graph here:
对不起,我没有详细解释所有内容,因为我错过了一些需要超过段落才能解释的东西,所以我把所有的图表都留在这里:
https://lockedloaded.gumroad.com/l/upczz
If you’re interested in buying it for more experiments. Make sure to follow me on Artstation for more stuff, the ones I did post before and the new stuff I’ll be posting in the future.
I hope you all like this breakdown and find it useful, If you have any questions I’ll be more than happy to help! Just leave me a message on my ArtStation or Email.
如果您有兴趣购买它以进行更多实验。确保在Artstation上关注我以获取更多内容,我以前发布的内容以及将来将要发布的新内容。
我希望你们都喜欢这个细分并发现它很有用,如果你有任何问题,我会非常乐意帮助!只需在我的ArtStation或Email上给我留言。
|


 评分
评分


