您需要 登录 才可以下载或查看,没有账号?注册

x
本帖最后由 执此一念 于 2022-1-10 11:42 编辑
在 3ds Max 和 UE4 中制作科幻模块化环境
Pavel Inozemtsev 讨论了 Omega Sci-Fi 模块化环境包背后的工作流程,重点介绍了装饰/贴花和信息贴花表的开发以及资产的创建。
Introduction 介绍
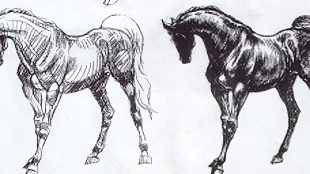
Hi, my name is Pavel Inozemtsev. I'm 34 years old. I work as a freelance 3D Artist but sometimes, I create tutorials (in Russian) for my personal project Polygon Stories. The first time I opened 3ds Max, probably, 18 years ago, and ever since then, it became my beloved program. 嗨,我的名字是 Pavel Inozemtsev。我今年 34 岁。我是一名自由 3D 艺术家,但有时,我会为我的个人项目Polygon Stories创建教程(俄语)。我第一次打开 3ds Max 大概是在 18 年前,从那时起,它就成了我心爱的程序。 The Omega Sci-Fi Modular Environment pack was created by me for the UE Marketplace. Also, I planned to develop a more effective pipeline for modular game-ready interior constructions and exercise myself in a sci-fi shape designing a bit. The inspiration was the design of Doom (2016) and Doom 3 games. That old and dark Martian base will always be giving me magic powers.
Omega Sci-Fi Modular Environment 包是我为 UE 市场创建的。此外,我计划为模块化游戏内部结构开发更有效的管道,并在科幻造型设计中锻炼自己。灵感来自 Doom (2016) 和 Doom 3 游戏的设计。那个古老而黑暗的火星基地将永远赋予我魔力。
Workflow 工作流程
I started creating the package in 3ds Max. The whole asset creation process can be divided into two stages. The first stage is developing trim/decal and info decal sheets, and the second one is the creation of assets themselves. Let's talk about the first one. 我开始在 3ds Max 中创建包。整个资产创建过程可以分为两个阶段。第一阶段是开发装饰/贴花和信息贴花表,第二阶段是创建资产本身。让我们谈谈第一个。 Trim, Decal, and Info Decal Sheets Decal/Trim sheet allows us to convey small and floating details and optimize the game project's performance using just a single texture set. I designed and modeled everything on my own and then baked it on a simple plane to get my textures. 贴花/修剪表允许我们仅使用单个纹理集来传达微小和浮动的细节并优化游戏项目的性能。我自己设计和建模所有东西,然后在一个简单的平面上烘焙它以获得我的纹理。
In order to maximize the package's efficiency, I needed to decrease the number of textures in the project as much as possible. That is why for the first sheet I decided to bake only Normal Map and Mask, which I planned to use for decal material in UE. 为了最大限度地提高包的效率,我需要尽可能减少项目中的纹理数量。这就是为什么在第一张纸上我决定只烘焙法线贴图和蒙版,我计划将它们用于 UE 中的贴花材质。 The sheet has 2 separate areas: - Mechanical trims and decals (75% of the texture space)
- Sign decals (25% of the texture space, right lower quarter)
This is how my final baked textures looked like:
The first area consists of B&W parts the main RGB colors determining different surface material zones. red – surface material 1; green – surface material 2; blue – emissive parts; black – primary object's surface; white – alpha. The second area is just signs, caution tablets, symbols, logos, etc. The future decal material should treat differently to those areas and their colors. 第一个区域由黑白部分组成,主要 RGB 颜色确定不同的表面材料区域。红色——表面材料 1;绿色——表面材料 2;蓝色——发光部分;黑色——主要物体的表面;白色 - 阿尔法。第二个区域只是标志、警示牌、符号、标志等。未来的贴花材料应该对这些区域和它们的颜色进行不同的处理。 I needed Info Decals texture to place some text and logo onto object surfaces in the Unreal Engine scene. It would give the capability to diverse asset look. So, I also created the sheet right here in 3ds Max: 我需要 Info Decals 纹理来在虚幻引擎场景中的对象表面上放置一些文本和徽标。它将赋予多样化资产外观的能力。所以,我也在 3ds Max 中创建了工作表:
I baked everything in PNG format using 3ds Max's Scanline Renderer and that handy baker that was finally implemented into the program. 我使用 3ds Max 的 Scanline Renderer 和最终实现到程序中的那个方便的面包师烘焙了 PNG 格式的所有东西。
The work with the first sheet wasn’t completed. I applied the material with baked textures to a copied plane that was used for the baking process earlier. Splitting all edges is the moment I’d like to talk about in more detail. 第一张纸的工作没有完成。我将具有烘焙纹理的材料应用到之前用于烘焙过程的复制平面上。分裂所有边缘是我想更详细讨论的时刻。 Some of my decals and trims have a "double structure" consisting of 2 major parts: the metal insert and the surface of an object where it will be inserted to. So, I just copied all polygons inside the Edit Poly modifier and assigned to the new parts different IDs. These IDs are going to be used to assign different decal materials in UE4 (transparent material with normal information and non-transparent one). Here is the final structure: 我的一些贴花和装饰具有“双重结构”,由 2 个主要部分组成:金属插件和将要插入的物体表面。所以,我只是复制了 Edit Poly 修改器中的所有多边形,并为新部件分配了不同的 ID。这些 ID 将用于在 UE4 中分配不同的贴花材质(具有正常信息的透明材质和非透明材质)。这是最终的结构:
After that, I divided the plane into separated objects by splitting borders and moving everything to a new scene where I planned to model assets: 之后,我通过分割边界并将所有内容移动到我计划对资产建模的新场景,将飞机划分为多个独立的对象:
The Creation of Assets 创建资产 Blockout is a crucial stage to know what exact assets you need to build for the final location and what scale they should have. I build map's fragments using simple shapes and boxes. Different colors meant unique meshes. The main goal was to see how those blocks connect to each other, especially in the corners. Such structure was enough to evaluate the scope of work:
封锁是了解您需要为最终位置构建哪些确切资产以及它们应该具有什么规模的关键阶段。我使用简单的形状和框来构建地图的片段。不同的颜色意味着独特的网格。主要目标是查看这些块如何相互连接,尤其是在角落。这样的结构足以评估工作范围:
In the future, some missing assets can be also quickly created from the existing ones. After everything became clear I picked single unique objects, copied them on a new layer and that was the starting point for the asset creation process itself. 将来,一些缺失的资产也可以从现有的资产中快速创建。在一切变得清晰之后,我选择了单个独特的对象,将它们复制到一个新层上,这就是资产创建过程本身的起点。 The modeling workflow looks like this:
Geometry creation – Just model it. Also, I assigned IDs to different parts determining surface materials that are going to be created in Unreal Engine.
几何创建——只需建模。此外,我为确定将在虚幻引擎中创建的表面材质的不同部分分配了 ID。
Adding chamfers – I used the Chamfer modifier most of the time. Sometimes, in some places, I needed different chamfer values, and the option "By Crease Weights" helped me with that.
添加倒角——我大部分时间都使用倒角修改器。有时,在某些地方,我需要不同的倒角值,而“按折痕重量”选项帮助我解决了这个问题。
- Adding Weighted Normals modifier – The simplest step. It is great that it was added to the 3ds Max standard modifiers set.
- 添加加权法线修改器 - 最简单的步骤。很高兴将它添加到 3ds Max 标准修改器集中。
- Adding decals, trims, and signs – Adding decals to the flat surface doesn't represent any challenge. You are just placing a decal and slightly offsetting it forward to exclude intersection.
- 添加贴花、装饰和标志——在平面上添加贴花并不代表任何挑战。您只是放置一个贴花并稍微向前偏移以排除交叉点。
It became harder with Curved Trims. I decided to use Splines with the Sweep modifier because it provides not only control over section width but also creates proper UVs saving me from doing it manually. Then I added the Edit Poly modifier to clear extra geometry having left only facial polygons and set Smoothing Groups. Next, I implemented the same decal structure described above: copied polygons with different IDs. 使用弯曲修剪变得更加困难。我决定将 Splines 与 Sweep 修改器一起使用,因为它不仅可以控制截面宽度,还可以创建适当的 UV,从而使我免于手动操作。然后我添加了编辑多边形修改器以清除仅留下面部多边形的额外几何体并设置平滑组。接下来,我实现了上述相同的贴花结构:复制具有不同 ID 的多边形。 And the final step is UVs. Thanks to the Sweep modifier we already have the correct straightened UV islands. We just need to scale and move them to the right places in the Normal texture. The whole workflow: 最后一步是UV。多亏了 Sweep 修改器,我们已经有了正确的拉直 UV 岛。我们只需要缩放并将它们移动到 Normal 纹理中的正确位置。整个工作流程:
Now it was time to create UVs for assets geometry. Nothing unusual here except for packing. I didn't plan to texture my assets in a classical way using Substance Painter. Because, again, I tried to avoid a large number of textures in the project. I was going to "wrap" each object in tileable textures of noise and metal scratches. It means that in this case, it wasn't too important how to pack UV islands. So, I just set the texel density (1024px/m) using a simple Texel Density script and pushed Pack Normalise. 现在是时候为资产几何体创建 UV。除了打包之外,这里没有什么不寻常的。我不打算使用 Substance Painter 以经典方式纹理我的资产。因为,再次,我试图避免项目中的大量纹理。我打算用噪音和金属划痕的平铺纹理“包裹”每个对象。这意味着在这种情况下,如何打包 UV 岛并不重要。所以,我只是使用一个简单的Texel Density 脚本设置了 texel 密度 (1024px/m)并推送了 Pack Normalise。
And to diversify the future asset pack, I quickly turned some of my meshes into similar ones but with different sizes. Of course, distorted places in UVs also should be fixed afterward: 为了使未来的资产包多样化,我迅速将我的一些网格变成了类似但大小不同的网格。当然,UV 中扭曲的地方也应该在之后修复:
I also manually created collisions for each asset:
For each asset, I grouped all geometry together with decals, properly named, and exported it using an absolutely irreplaceable Batch Exporter script by Benjamin Boscher. It does a few very important things automatically: places our object into the coordinate center, converts it into an editable mesh, and resets all transformations. I had about 50 meshes. It is hard to imagine the time I would have spent doing those actions manually.
Texturing 纹理
I quickly created noise and scratches textures in Substance Designer, imported all meshes and it was time to work on materials. For the main parent material, I created the capability to change Color, Roughness, and Metalness levels. Plenty of other materials were just instances of this parent one. 我在 Substance Designer 中快速创建了噪点和划痕纹理,导入了所有网格,是时候处理材质了。对于主要的父材质,我创建了更改颜色、粗糙度和金属度级别的功能。许多其他材料只是这个父材料的实例。 The major challenge was the creation of decal materials. I needed two: the non-transparent material for the mechanical parts of decals and the transparent material with only Normal information projecting onto the object’s surface. Unfortunately, there is still no simple way to realize such an inserted decal procedure in UE4. So, I’ll just illustrate the main features. 主要挑战是创建贴花材料。我需要两个:贴花机械部分的非透明材料和只有法线信息投射到物体表面的透明材料。不幸的是,在 UE4 中仍然没有简单的方法来实现这种插入贴花程序。因此,我将仅说明主要功能。 As you remember, our baked RGB mask consists of two major parts – trim/decals and signs. First, I had to separate those areas by creating a procedural mask inside the decal material scheme. 您还记得,我们烘焙的 RGB 蒙版由两个主要部分组成 - 装饰/贴花和标志。首先,我必须通过在贴花材质方案中创建程序蒙版来分离这些区域。
As I mentioned earlier, I was going to use RGB mask channels to outline material zones. 3 types of materials: surface material 1 (Red), surface material 2 (Green), and emissive parts (Blue). Using these channels, I implemented 3 materials with Base Color, Roughness, and Metalness controls inside the main material. 正如我之前提到的,我打算使用 RGB 蒙版通道来勾勒材质区域。3种材料:表面材料1(红色)、表面材料2(绿色)和发光部件(蓝色)。使用这些通道,我在主材质中实现了 3 种材质,其中包含 Base Color、Roughness 和 Metalness 控件。
Everything is far simpler with the signs area. I've added Desaturation, Roughness, and Wear regulators. 标志区的一切都简单得多。我添加了去饱和度、粗糙度和磨损调节器。
The transparent decal material:
The final decals and trims look in UE4:
To use my Info Decals texture, I had to create a material in which I could offset and crop the image leaving only the peace of information I need. Together with the UE4 decal object, I was able to put the text on any object’s surface: 要使用我的 Info Decals 纹理,我必须创建一种材质,我可以在其中偏移和裁剪图像,只留下我需要的信息。与 UE4 贴花对象一起,我能够将文本放在任何对象的表面上:
After that, I finished creating and assigning materials to meshes, so I could start building the scene. It was easy because from the beginning all meshes were created in sizes divisible by 50, 10, and 5 cm. 在那之后,我完成了为网格创建和分配材质,所以我可以开始构建场景了。这很容易,因为从一开始所有网格的大小都可以被 50、10 和 5 厘米整除。
Lighting and Rendering 照明和渲染
The scene's lighting role was given to my light fixtures. I constructed them the way their parts could be rotated or moved to change light direction. Later, each light fixture was put together with pieces inside the UE4 blueprint. 场景的照明角色被赋予了我的灯具。我构造它们的方式是它们的部件可以旋转或移动以改变光的方向。后来,每个灯具都与 UE4 蓝图中的零件拼凑在一起。
As for the light source, I used a simple Rect Light. These objects were my only tools to light the whole scene. 至于光源,我使用了一个简单的 Rect Light。这些物体是我照亮整个场景的唯一工具。
Finally, I added fog and slightly increased bloom using PostProcessVolume. 最后,我使用 PostProcessVolume 添加了雾并略微增加了光晕。 Conclusion 结论 Well, I’ve described the most interesting moments in the project, from my perspective. The most time-consuming parts were decals/trims designing and modeling and building materials in UE4. The good thing is now I can use them in the following scenes. To me, the greatest help was Sergey’s Tyapkin tutorials He works in Blender and it was a challenge to realize a similar workflow in 3ds Max. I’ve also read a lot of topics on the Polycount forum. This is the place where strong professionals constantly exchange their experiences. I’ve also tried to implement some of the design principles described by Alex Senechal in his Visual Design Basics – Intro to Design course.
END | 


 评分
评分