您需要 登录 才可以下载或查看,没有账号?注册

x
本帖最后由 Ciel。 于 2022-1-1 09:33 编辑
13 NOVEMBER 2021 The Road to El Dorado – Environment Breakdown – Isa Raaijmakers 2021 年 11 月 13 日 通往埃尔多拉多之路 - 环境分解 - Isa Raaijmakers
Intro Hello everyone, I am Isa Raaijmakers from the Netherlands. Currently, I am in the process of finding a job in the industry. Recently I graduated from Breda University of Applied Sciences. In my free time, I like to go for walks, cook, work in my bullet journal and play the piano. Entering my final year in school I have the opportunity to work on a project of my own choosing. Although a supervisor is assigned, you have to work in an independent way. In the final weeks of my graduation, I had some time left after finishing my last project “Mountain Side Village” and I thought to myself, “Let’s start this really big project with 5 weeks left until I graduate”. And here we are, after a bit longer than 5 weeks.
介绍 大家好,我是来自荷兰的 Isa Raaijmakers。目前,我正在寻找该行业的工作。最近我毕业于布雷达应用科学大学。在空闲时间,我喜欢散步、做饭、写子弹日记和弹钢琴。进入我在学校的最后一年,我有机会从事自己选择的项目。虽然分配了主管,但您必须以独立的方式工作。在我毕业的最后几周,我在完成最后一个项目“山边村”后还有一些时间,我对自己说,“让我们在离毕业还有 5 周的时候开始这个真正的大项目吧”。经过 5 周多一点的时间,我们来到了这里。
The reference When looking at the art of the movie “The Road to El Dorado” I see a mysterious, magical and beautiful world, with bright colours, inspiring architecture and lush vegetation. But most importantly I saw an environment I would love to explore, and I did through recreating it in 3D. When searching for references I found animationscreencaps.com. This site has screen captures from multiple animated movies. On the website, I went through all the images and picked every image that had some information I thought might help me. Like texture information, details, props, etc.
参考 当看电影《通往埃尔多拉多之路》的艺术时,我看到了一个神秘、神奇而美丽的世界,有着鲜艳的色彩、鼓舞人心的建筑和茂密的植被。但最重要的是,我看到了一个我很想探索的环境,我通过 3D 重新创建了它。在搜索参考资料时,我找到了 animationscreencaps.com。该网站有来自多部动画电影的屏幕截图。在网站上,我浏览了所有图片并挑选了每张图片,其中包含一些我认为可能对我有帮助的信息。如纹理信息、细节、道具等。
Planning the project 规划项目
When I started to plan the project I first categorized the components in the scene as you can see by the colour markings in the image above. This is a technique I have learned from , she is a really talented artist and shares a lot of useful information. I cannot stress enough how much I have learned from her.
当我开始计划项目时,我首先对场景中的组件进行了分类,如上图中的颜色标记所示。这是我从那里学到的一种技巧,她是一位非常有才华的艺术家,并分享了很多有用的信息。我从她那里学到了多少,我怎么强调都不为过。
Using this colour coding method gives you a good overview of what you need to make. It also gave me some idea how my trim sheet should look like and what kind of patterns I would need. I did change some things during the process but it’s really useful to start a project this way. When finishing modular objects I like to place them immediately in the scene and see how much space those objects already occupy, you will be surprised how much you can do with a couple of modular assets and a trim-sheet.
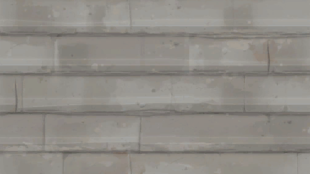
使用这种颜色编码方法可以让您对需要制作的内容有一个很好的概述。它还让我知道我的装饰片应该是什么样子以及我需要什么样的图案。在这个过程中我确实改变了一些东西,但以这种方式开始一个项目真的很有用。在完成模块化对象时,我喜欢将它们立即放置在场景中并查看这些对象已经占用了多少空间,您会惊讶于使用几个模块化资产和装饰表可以做多少事情。 Modularity and trim sheets Here I will explain a bit about how I created my trim-sheets. I started with blocking out the trims in Maya and imported this to Zbrush. There I started sculpting details and edge wear. The next step was to export the high poly meshes to Substance designer and baking the ambient occlusion map, normal map and curvature map. In the image below you can see the finished result. You can also see that I created an additional bluestone version, which only takes a bit of extra time and gets you double the value of your trim.
模块化和装饰板 在这里,我将解释一下我是如何创建我的修剪表的。我从在 Maya 中屏蔽掉修剪开始,然后将其导入 Zbrush。在那里,我开始雕刻细节和边缘磨损。下一步是将高多边形网格导出到 Substance Designer 并烘焙环境光遮挡贴图、法线贴图和曲率贴图。在下图中,您可以看到完成的结果。您还可以看到我创建了一个额外的青石版本,它只需要一点额外的时间,并使您的装饰价值翻倍。 Adding colour variation can be difficult so here are the nodes and techniques I use to get a diverse trim. I start off with a baked ambient occlusion and play with the values so I get a black and white map of only the edges of my trim. From here I add a flood fill node and generate a random grey coloured map. Using the distance node leaves me with all the shapes of the trim-sheet and this way I can easily add a gradient map to start with a good base.
添加颜色变化可能很困难,所以这里是我用来获得多样化修剪的节点和技术。我从烘焙的环境遮挡开始,并使用这些值,所以我只得到了 修剪边缘的黑白贴图。从这里我添加一个洪水填充节点并生成一个随机的灰色地图。使用距离节点给我留下了修剪表的所有形状,这样我就可以轻松添加渐变贴图,以从一个好的基础开始。
After creating the base I add a bigger diversity of colours and start working on the texturing style. I add more colours to the base, some spots with purple and yellow. I then warp this map to get a hand-painted touch to it. Then I create a random colour map from the flood fill. After creating these maps I blend these 3 maps together. The random colour map should be on a very low opacity of course. The next steps would be to add more details and start playing around with different nodes. Personally, I like to use the light node and baked maps like curvature for the edge wear.
创建基础后,我添加了更大的颜色多样性并开始处理纹理样式。我在底座上添加了更多颜色,一些带有紫色和黄色的斑点。然后我扭曲这张地图以获得手绘的触感。然后我从洪水填充创建一个随机颜色贴图。创建这些贴图后,我将这 3 个贴图混合在一起。当然,随机颜色贴图的不透明度应该非常低。接下来的步骤是添加更多细节并开始使用不同的节点。就个人而言,我喜欢使用光节点和烘焙贴图,例如边缘磨损的曲率。
Foliage Looking at the reference, it was clear a lot of foliage was needed to make the scene similar. Preferably I also wanted an easy way of placing the foliage throughout the scene. My plan for the foliage was to make a base mesh that would serve as a foundation and layer foliage on top of that. I recently had seen some artworks that use billboard texturing to make foliage and thought this would be a perfect base to start with. In the image, you can see how the base mesh is just an abstract shape. Then using the billboard texture technique I get a better base with more shape. Finally, I finish the foliage by layering it with some foliage meshes.
叶子 查看参考资料,很明显需要大量树叶才能使场景相似。最好我还想要一种在整个场景中放置树叶的简单方法。我对树叶的计划是制作一个基础网格,作为基础,并在其上铺上一层树叶。我最近看到一些使用广告牌纹理制作树叶的艺术品,并认为这将是一个完美的基础。在图像中,您可以看到基础网格只是一个抽象形状。然后使用广告牌纹理技术,我得到了一个更好的基础和更多的形状。最后,我通过用一些树叶网格分层来完成树叶。
Foliage | Meshes Since a lot of foliage was needed for the scene I wanted to make the foliage fast and easy. I started sculpting leaves in Zbrush and created the different types of plants with different leaf variations. For the Ivy-like plants, that use a lot of separate leaves, I try to make 3-4 leaf variations and place them after I have finished sculpting. Looking back I think the sculpts could have been more consistent. The style of the leaves with the harsh lines and soft lines could be a point of improvement for next time. It takes a while until you see what you could have done better but that’s okay. Keep looking back on your past projects and try to learn from them.
树叶 | 网格 由于场景需要大量的树叶,我想让树叶变得快速而简单。我开始在 Zbrush 中雕刻叶子,并创建了具有不同叶子变化的不同类型的植物。对于使用大量独立叶子的常春藤状植物,我尝试制作 3-4 片叶子的变化,并在完成雕刻后放置它们。回想起来,我认为雕刻本可以更加一致。粗线条和柔和线条的叶子风格可能是下次改进的点。需要一段时间才能看到您可以做得更好的地方,但这没关系。不断回顾你过去的项目并尝试从中学习。
Texturing | Props For the clay pots in my scene, I sculpted the assets in Zbrush and baked the high poly information in Substance Painter. To give the pots more of an authentic, handmade look I added height information with some “wobbles” and this also makes the shadow a bit more interesting on the props. After texturing I adjusted the meshes a bit in Maya to make them less symmetrical. This is something I like to do after texturing since the texturing process will be easier with straight UVs. As you can see in the image, I added multiple texture variations to have a diverse set of pots without having to make a lot of assets.
纹理 | 道具 对于场景中的陶罐,我在 Zbrush 中雕刻了资产,并在 Substance Painter 中烘焙了高多边形信息。为了让花盆看起来更真实,手工制作,我添加了一些“摆动”的高度信息,这也使道具上的阴影更有趣。纹理化后,我在 Maya 中稍微调整了网格,使它们不那么对称。这是我喜欢在纹理化后做的事情,因为使用直 UV 纹理化过程会更容易。正如您在图像中看到的,我添加了多个纹理变化来拥有一组不同的盆,而不必制作大量资产。
Water 水 The water consists of multiple components: 水由多种成分组成:
· 水着色器 The water shader · 水厂 The water plants · 浮萍 Duckweed · 鱼 Fishes · 瀑布 Waterfall
Water | Shader The water shader tutorial by was really informative and useful and I can recommend watching it when attempting a water shader material. Using depth fade is really helpful in creating depth and is easily customizable. I don’t feel like I can say a lot about my material since it’s mostly a bunch of tutorials put together. I used two texture maps with a panner node and multiplied these for the glimmers in the water.
水 | 着色器 的水着色器教程非常有用且有用,我建议在尝试水着色器材质时观看它。使用深度淡入淡出对于创建深度非常有帮助,并且可以轻松自定义。我觉得我不能说太多关于我的材料,因为它主要是一堆教程放在一起。我使用了两个带有平移器节点的纹理贴图,并将它们相乘以获得水中的微光。
Water | Plants For the plants I reused the lotus leaves I had created for a different project and adjusted the texture to what I needed in this scene. To add to the foliage I created two different lily pads, big ones and smaller ones. The smaller ones I grouped for faster placement. The best way to place these is by using the foliage tool in Unreal Engine. The foliage tool acts like a paintbrush, which allows me to start painting foliage on a plane. The foliage tool can configured to place random scaled mesh within a set range.
水 | 植物 对于植物,我重用了我为不同项目创建的荷叶,并将纹理调整为我在这个场景中需要的。为了增加叶子,我创建了两种不同的睡莲,大的和小的。我将较小的分组以便更快地放置。放置这些的最好方法是使用虚幻引擎中的植物工具。树叶工具就像画笔一样,让我可以开始在平面上绘制树叶。植物工具可以配置为在设定范围内放置随机缩放的网格。
Water | Duckweed The duckweed added a lot to the water and scene overall, but I couldn’t have done it without the help of , who is always open to sharing his knowledge. The duckweed texture is created in Substance designer as well as the heightmap. With the vertex paint tool in Unreal Engine, I am able to paint and blend the duckweed in the water. The heightmap controls the shape the duckweed follows. There is also a hue shift on the edge of the duckweed that you are able to adjust. As always I made sure there were enough colour variations in the base colour.
水 | 浮萍 浮萍为整体的水和场景增添了很多,但如果没有的帮助,我不可能做到,他总是分享他的知识。浮萍纹理是在 Substance Designer 和高度图中创建的。使用虚幻引擎中的顶点绘制工具,我能够在水中绘制和混合浮萍。高度图控制浮萍遵循的形状。您可以调整浮萍边缘的色调偏移。和往常一样,我确保基色有足够的颜色变化。
Water | Fishes The fishes were a lot more difficult than I hoped they would be. The meshes are simple fish-shaped meshes and the colour was done in the engine so I could easily adjust it. The fish meshes consist out of either one fish or a group of two or three fishes and those follow a spline and have a material using world position offset to make it look like they are swimming.
水 | 鱼 这些鱼比我希望的要困难得多。网格是简单的鱼形网格,颜色是在引擎中完成的,所以我可以很容易地调整它。鱼网格由一条鱼或一组两条或三条鱼组成,它们遵循样条曲线,并具有使用世界位置偏移的材质,使其看起来像在游泳。
Water | Waterfall Someone I can also highly recommend to follow is , a gem in the technical, stylized art community. Her blogs and art breakdowns helped me a lot with creating my own little waterfall. I created my own material for the waterfall and used a panner node to make the texture move. Nothing too complicated but enough to make a great waterfall. I also added a world position offset to make the water move a bit in the scene. Since the water was coming from one of the head sculptures I didn’t want the top side to move so I used a bounding box-based node to slowly adjust the flow of the waterfall while going down.
水 | 瀑布 我也强烈推荐关注的人是,她是技术、风格化艺术社区中的一颗。她的博客和艺术分类对我创建自己的小瀑布有很大帮助。我为瀑布创建了自己的材质,并使用平移器节点使纹理移动。没有什么太复杂的,但足以制作一个很棒的瀑布。我还添加了一个世界位置偏移,使水在场景中移动一点。由于水来自其中一个头部雕塑,我不希望顶部移动,因此我使用基于边界框的节点在下降时缓慢调整瀑布的流量。
And this concludes the breakdown regarding the water in my scene. I especially liked making the waterfall. It was easy and added a lot to my scene. 这结束了我场景中关于水的细分。我特别喜欢制作瀑布。这很容易,并为我的场景增加了很多。
Lighting The lighting in the scene is mostly done by trial and error. Skylight is very important to adjust the darkness of the shadow, if you want very dark shadows it will be lower and vice versa. Atmospheric fog is used, and warm directional light. At the end of the project, I added some spotlights to make the gold reflect more at places or to light some parts up. Using spotlights instead of point lights will keep your scene a bit more optimized.
灯光 场景中的照明主要是通过反复试验来完成的。天光对于调整阴影的暗度非常重要,如果你想要很暗的阴影,它会更低,反之亦然。使用大气雾和温暖的定向光。在项目结束时,我添加了一些聚光灯,使黄金在某些地方反射更多或照亮某些部分。使用聚光灯而不是点光源将使您的场景更加优化。
Making the scene feel alive 让场景充满活力
One important thing in finalizing your scene is to make it feel alive. The movie is of course filled with colourful characters. 完成场景的一件重要事情是让它感觉生动。这部电影当然充满了丰富多彩的人物。
However, being an environment artist, I am not experienced in making characters and it would take way too much time. Movement is very important, so make a list that could enhance the atmosphere or bring movement to your scene. For example, my list contained stuff like: Falling leaves, (small) waterfall, fish in the water, wind through the leaves, god rays. 然而,作为一名环境艺术家,我在制作角色方面没有经验,而且会花费太多时间。运动非常重要,因此请列出可以增强氛围或为您的场景带来运动的清单。例如,我的列表包含以下内容: 落叶、(小)瀑布、水中的鱼、穿过树叶的风、上帝的光芒。
Think about what kind of weather is present in your scene and adjust your scene to that environment. For example, in the desert there might be sand blowing, a tumbleweed rolling in the background, the possibilities are endless. Audio can also have a big effect on the liveliness or mood. 考虑一下您的场景中存在什么样的天气,然后将您的场景调整到该环境中。例如,在沙漠中可能有沙子在吹,背景中有风滚草在滚动,可能性是无限的。音频也可以对活泼或情绪产生很大的影响。
For example, hearing raindrops fall or hearing the wind blow or leaves rustling. In a scene depicting a big city, you might add car sounds even though there aren’t any cars in the scene. This can make your environment feel bigger than what you are showing. The illusion of a bigger world than it actually is. 例如,听到雨滴落下或听到风吹或树叶沙沙作响。在描绘大城市的场景中,即使场景中没有任何汽车,您也可以添加汽车声音。这会让你的环境感觉比你展示的更大。一个比实际更大的世界的幻觉。
Additional advice The best advice I feel like I can give people is what helped me the most. Number one, stop comparing yourself and start getting inspired! I know it’s hard but when you are comparing yourself, you often start making similar stuff to someone else and it will never look the same, and therefore you might not feel satisfied. So start doing your own thing.
附加建议 我觉得我能给别人的最好的建议是对我帮助最大的。第一,停止比较自己并开始获得灵感!我知道这很难,但是当您比较自己时,您经常会开始制作与其他人相似的东西,并且看起来永远不会相同,因此您可能会感到不满意。所以开始做自己的事情。
Get inspired and learn from other artists. I thought this would never be possible for anxious, self-conscious me, but when I stopped comparing myself to others is when I made the biggest steps! It’s a process, so it’s not like you can flip a switch but it will help you in the end. My second piece of advice is to finish projects. 从其他艺术家那里获得灵感和学习。我以为这对于焦虑、有自我意识的我来说永远不可能,但是当我停止与他人比较时,就是我迈出最大步伐的时候!这是一个过程,所以它不像你可以拨动一个开关,但它最终会帮助你。我的第二个建议是完成项目。
Although it’s true you will always learn when creating stuff. You will miss an essential part of the learning process, namely the polishing part, this is important to push your art piece to the next level. For example, if I had stopped working on this project in the last week, I wouldn’t have learned how to make waterfalls and water ripples. I learned about composition when deciding my shots and I learned about set dressing when making final small changes to my scene. 虽然这是真的,但你总是会在创造东西时学习。您将错过学习过程的一个重要部分,即打磨部分,这对于将您的艺术作品提升到一个新的水平很重要。例如,如果我在上周停止了这个项目的工作,我就不会学会如何制作瀑布和水波纹。我在决定拍摄时学习了构图,在对场景进行最后的小改动时我学习了布景。
Outro 奥特罗
Thank you for reading my article, I hope it both inspired and informed you. Please feel free to contact me with additional questions related or unrelated to the article! 感谢您阅读我的文章,我希望它对您有所启发和启发。如有与文章相关或无关的其他问题,请随时与我联系! isa_raaijmakers@outlook.com https://www.linkedin.com/in/isaraaijmakers/
|