您需要 登录 才可以下载或查看,没有账号?注册

x
本帖最后由 七月纪旅。 于 2022-8-6 11:41 编辑
Part 3: Types of Normal Maps
第 3 部分:法线贴图的类型
Like many things in this industry, normal maps have evolved throughout the years. There are several types of normal maps and they may look different. Here's a compilation of the ones I can remember, but there might be others as well.
像这个行业的许多东西一样,法线图多年来一直在发展。有几种类型的法线贴图,它们可能看起来不同。以下是我能记住的那些的汇编,但可能还有其他的。
Tangent space normal map: this is the most common normal map nowadays, and the one we have been talking about in the previous parts of this tutorial. It modifies the normal direction of the model based on the normal direction of its vertices (so we must control the vertex normals of our low-poly).
切线空间法线映射:这是当今最常见的法线映射,也是我们在本教程前面部分中一直在讨论的那个。它根据其顶点的法线方向修改模型的法线方向(因此我们必须控制低多边形的顶点法线)。

Mikk tangent space normal map. Not every program calculates the average of the vertex normals the same way. This can lead to differences in how a normal map looks in different engines, so we should bake the normal map using the same method as the rendering program will use (this is called "using a synched workflow").
米克切线空间法线图。并非每个程序都以相同的方式计算顶点法线的平均值。这可能会导致法线贴图在不同引擎中的外观有所不同,因此我们应该使用与渲染程序相同的方法烘焙法线贴图(这称为“使用同步工作流”)。
Mikk is a proposed way to calculate vertex normals aimed to be universal so that every program calculates them in the same way. Workflow-wise, this means that we can use a low-poly with all its vertex normals averaged (one smoothing group or all edges smooth), bake a normal map using the Mikk tangent space and it will look just like the high-poly without having to deal with smoothing errors or separating the hard edges in the UVs. I will upload a tutorial on how to do this in the future.
Mikk是一种计算顶点法线的方法,旨在实现通用,以便每个程序都以相同的方式计算它们。在工作流程方面,这意味着我们可以使用低多边形,其所有顶点法线均值(一个平滑组或所有边缘平滑),使用Mikk切线空间烘焙法线贴图,它看起来就像高多边形一样,而不必处理平滑错误或分隔UV中的硬边。我将上传一个教程,说明将来如何做到这一点。
Keep in mind that this is still a tangent space normal map, but the normals of the models are calculated in a way that is universal and interchangeable between programs.
请记住,这仍然是一个切线空间法线映射,但模型的法线是以程序之间通用和可互换的方式计算的。

2-channel tangent space normal map: turns out that using the information stored in two of the three channels of a normal map, the computer can calculate the third one, reducing memory usage but slightly increasing processing usage. Since memory is usually a bigger concern, this optimization is commonly used and some engines do it automatically (i.e. Unreal Engine when we set a texture normal compression to "normal map"). Freeing up a channel on our normal map allows us to reduce the texture size or use the channel for metalness/roughness/opacity.
2通道切线空间法线映射:原来,利用存储在一个法线映射的三个通道中的两个通道中的信息,计算机可以计算出第三个通道,减少了内存使用量,但略微增加了处理使用量。由于内存通常是一个更大的问题,因此通常使用这种优化,并且某些引擎会自动执行此操作(即,当我们将纹理正常压缩设置为“法向贴图”时,虚幻引擎)。在法线贴图上释放通道可以减少纹理大小或使用通道进行金属性/粗糙度/不透明度。
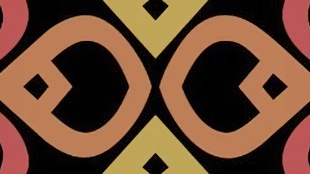
Usually, the discarded normal map channel is the blue one, so these textures look yellow. This optimization is sometimes done automatically by some engines, so you might see these textures from time to time in your project.
通常,丢弃的法线贴图通道是蓝色的,因此这些纹理看起来是黄色的。此优化有时由某些引擎自动完成,因此您可能会不时在项目中看到这些纹理。
World space normal map: instead of modifying the normal direction of the vertex normals, this normal map ignores them completely and changes how the low-poly bounces light in the world space (considers the normals of the vertices as aligned with the world when baking).
世界空间法线贴图:此法线贴图不会修改顶点法线的法线方向,而是完全忽略它们,并更改低多边形在世界空间中反射光线的方式(在烘焙时将顶点的法线视为与世界对齐)。
Think of the tangent space normal map as "you should reflect light to your right" and a world space normal map as "you should bounce light to the east".
将切线空间法线图视为“您应该将光线反射到右侧”,将世界空间法线地图视为“您应该向东反射光线”。
These normal maps are more colorful and have more prominent gradients; they were used because one didn't have to worry about the low-poly vertex normals, but they have a drawback - you can't move the model as it will look strange (we are setting a face so it always bounces the light to the east. If you rotate it, the face will keep bouncing the light to the east).
这些法线贴图更加丰富多彩,并且具有更突出的渐变;使用它们是因为不必担心低多边形顶点法线,但它们有一个缺点 - 你不能移动模型,因为它看起来很奇怪(我们正在设置一个面,所以它总是将光线反射到东方。如果你旋转它,脸部会继续将光线向东反射)。
World space normal maps are very rarely used in games nowadays, but they can be used to create some nice textures, i.e. the blue channel shows how your model should bounce the light that comes from the top of the model. You can use this to add a painted light to the texture.
如今,世界空间法线贴图很少用于游戏中,但它们可以用来创建一些漂亮的纹理,即蓝色通道显示您的模型应该如何反射来自模型顶部的光线。您可以使用它向纹理添加彩绘光。
Keep in mind that the world coordinates change between applications: in Unreal, 3D Studio Max, and Blender the Z-axis is up, while in Maya, Modo, and Cinema4D, Y is up. This means that world space normal maps can break when changing between different applications.
请记住,世界坐标在应用程序之间是变化的:在虚幻引擎、3D Studio Max和Blender中,Z轴是向上的,而在Maya、Modo和Cinema4D中,Y轴是向上的。这意味着世界空间法线贴图在不同应用程序之间切换时可能会中断。
Object space normal map: this is an upgraded version of the world space normal map, and it's very similar to the latter. The idea is that when moving the model in the world, its world space normal map would change to reorient itself relative to the object.
对象空间法线图:这是世界空间法线图的升级版,与后者非常相似。这个想法是,当在世界中移动模型时,其世界空间法线图将发生变化,以相对于对象重新定向自身。
Think of it as "this face will bounce light to the right of the model". If you rotate the model in the world, the normal map would reflect this change. However, this doesn't work with deforming meshes, as it only takes into account the object transform. This is the reason that tangent space normal maps are more widely used today.
可以把它想象成“这张脸会把光反射到模特的右边”。如果在场景中旋转模型,则法线贴图将反映此更改。但是,这不适用于变形网格,因为它只考虑对象变换。这就是切线空间法线贴图在今天被更广泛地使用的原因。
Bent normal maps: they basically combine the information of an AO and a normal map, bending the normal directions so that light tends to bounce towards the parts of the model that are exposed to the light.
弯曲的法线贴图:它们基本上结合了AO和法线贴图的信息,弯曲法线方向,使光线倾向于反射到暴露在光线下的模型部分。
These are basically used for improving Ambient Occlusion and avoiding an effect called "light leaking", where a model could bounce light from parts that light shouldn't reach. I never personally used them, but I would investigate them if I had a noticeable "light leak". You can find more info here, here and here.
这些基本上用于改善环境光遮蔽并避免称为“漏光”的效果,其中模型可以从光线不应到达的部分反射光线。我从未亲自使用它们,但是如果我有明显的“漏光”,我会调查它们。您可以在此处,此处和此处找到更多信息。
16-bit normal maps: sometimes, if we have a very smooth gradient in our normal map, we can see some banding. This banding comes from the lack of enough colors to represent the smooth gradient, usually from texture compression.
16 位法线贴图:有时,如果我们的法线贴图中有非常平滑的渐变,我们可以看到一些条带。这种条纹来自缺乏足够的颜色来表示平滑的渐变,通常来自纹理压缩。
Even then, sometimes we have a large and smooth surface and these problems appear even with an uncompressed texture. In this case, we can use 16-bit normal maps, usually as .tga files, which have more colors and are larger in size than the usual 8-bit normal maps.
即便如此,有时我们也有一个大而光滑的表面,即使纹理没有压缩,这些问题也会出现。在这种情况下,我们可以使用16位法线贴图,通常作为.tga文件,这些文件具有比通常的8位法线贴图更多的颜色并且大小更大。
You can learn much more about 16-bit normal maps from the god of tutorials himself, Earthquake.
你可以从教程之神地震那里学到更多关于16位法线图的知识。
Keep in mind that there are other techniques that can be used to mitigate this problem, such as removing the normal map altogether (use only geometry to represent this smooth surface), making the low-poly more similar to the high-poly so that the gradients are less noticeable, or using dithering.
请记住,还有其他技术可用于缓解此问题,例如完全删除法线贴图(仅使用几何图形来表示此光滑表面),使低多边形更类似于高多边形,以使渐变不那么明显,或使用抖动。
So, which one should we use?
那么,我们应该使用哪一个呢?
Mikk Tangent space normal maps are 90% of the time the best option. Unlike with world and object space normal maps, your model will be able to deform and the normal direction will remain correct.
Mikk切线空间法线图是90%时间的最佳选择。与世界和对象空间法线贴图不同,您的模型将能够变形,法线方向将保持正确。
You should bake your normal map using the same tangent space as the rendering program. The most used tangent space is Mikk, so you should use it when possible.
应使用与渲染程序相同的切线空间烘焙法线贴图。最常用的切线空间是 Mikk,因此应尽可能使用它。
And, if your normal map is showing some pixelation, consider using 16-bit normal maps or one of the solutions mentioned above.
而且,如果您的法线贴图显示一些像素化,请考虑使用 16 位法线贴图或上述解决方案之一。
Those are basically all the normal maps I have encountered that I can remember. If you know about some other types of normal maps, let me know so I can include them in this tutorial!
这些基本上是我遇到的所有我记得的法线图。如果您知道一些其他类型的法线贴图,请告诉我,以便我可以将它们包含在本教程中!
P.S.: Thanks to Shnya for his feedback and help.
P.S.:感谢Shnya的反馈和帮助。
Part 4. Normal Map Troubleshooting
第4部分。法线图故障排除
Here′s a compilation of normal map problems I have seen throughout the years, and some of the solutions I know to fix them.
以下是我多年来看到的法线图问题的汇编,以及我知道的一些修复它们的解决方案。
Problem: there are "black lines" or "insets" at the edges of my model.
问题:我的模型边缘有“黑线”或“插图”。
This happens when you have hard edges in your model, because the vertices of your model have normals completely perpendicular to the polygon surface, and this can cause the baker to miss some details (leaving those black lines in your model).
当模型中有硬边时,会发生这种情况,因为模型的顶点具有完全垂直于多边形曲面的法线,这可能会导致面包师错过一些细节(在模型中留下这些黑线)。
Solution: normal map bakers take this problem into consideration when creating normal maps, and try to mitigate it by calculating a little bit extra information beyond the vertex normals, but in order to store it, they need a gap between the polygon UVs.
解决方案:法线贴图烘焙师在创建法线贴图时会考虑这个问题,并尝试通过计算顶点法线以外的一点额外信息来缓解它,但是为了存储它,他们需要多边形UV之间的间隙。
Here′s a more detailed explanation, but the rule of thumb is very simple: whenever you have a hard edge in your model, separate the faces connected by it in your UVs.
这里有一个更详细的解释,但经验法则非常简单:每当你的模型中有一个硬边时,在你的UV中分离由它连接的面。
Problem: my normal map looks VERY wrong, especially from some angles.
问题:我的法线地图看起来非常错误,特别是从某些角度看。
This problem can appear for multiple reasons, let′s discuss some of them:
出现此问题的原因有多种,让我们讨论其中的一些原因:
1. You are using the wrong tangent space: The normals on your low-poly that we are trying to bend using a normal map can be calculated differently in the baking program compared to the program you are using to render the model. If this calculation differs, your normal map can look very strange, especially from some angles.
1. 您使用了错误的切线空间:我们尝试使用法线贴图弯曲的低多边形上的法线在烘焙程序中可以与您用于渲染模型的程序不同。如果此计算方法不同,则您的法线地图可能看起来非常奇怪,尤其是从某些角度看。
Alternatively, it is possible that you are using a world space normal map as a tangent space normal map. In this case, make sure you are baking a tangent space normal map and using it as such.
或者,您可能正在使用世界空间法线贴图作为切线空间法线贴图。在这种情况下,请确保烘焙切线空间法线贴图并按此方式使用它。
Solution: always try to use the Mikk tangent space basis to calculate your normal maps. This is a standardized way of calculating normals that was made to avoid these problems. If your normal map baking program can't use Mikk, try using a program such as Handplane to switch between one tangent space and the other.
解决方案:始终尝试使用 Mikk 切线空间基来计算法线贴图。这是一种计算法线的标准化方法,旨在避免这些问题。如果您的普通地图烘焙程序无法使用 Mikk,请尝试使用手绘等程序在一个切线空间和另一个切线空间之间切换。
2. You are using gamma correction on your normal map: normal maps are not regular images with color information. They carry surface normal information and don't behave as color images. Gamma correction is an adjustment to the colors of an image and can change the color of your normal map in unwanted ways. To remove the gamma correction on your normal map, change the color space of your normal map to linear/linear color/raw, or untick the sRGB option in Unreal Engine.
2. 您在法线贴图上使用伽玛校正:法线贴图不是具有颜色信息的常规图像。它们携带表面法线信息,不表现为彩色图像。Gamma 校正是对图像颜色的调整,可以以不需要的方式更改法线贴图的颜色。要删除法线贴图上的伽玛校正,请将法线贴图的色彩空间更改为线性/线性颜色/原始色,或在虚幻引擎中取消选中sRGB选项。
3. You are not using a tangent space normal map as a tangent space normal map: make sure your engine is not using your tangent space normal map as an object space normal map, a bump map, displacement map, etc.
3.您没有使用切线空间法线贴图作为切线空间法线贴图:确保您的引擎没有使用切线空间法线贴图作为对象空间法线贴图,凹凸贴图,位移贴图等。
4. Your low-poly normals are different in your baking program from the low-poly normals in your rendering program: this can happen if you lose smoothing groups/hard edge information during the export/import when you are using custom/weighted normals and your rendering program doesn't support them or discards this information.
4. 烘焙程序中的低多边形法线与渲染程序中的低多边形法线不同:如果在使用自定义/加权法线时在导出/导入过程中丢失平滑组/硬边信息,并且渲染程序不支持它们或丢弃此信息,则可能会发生这种情况。
In this case, compare the low-poly in both apps and if they look different, try changing the import/export settings, the file formats you are using (OBJ files lose normal information), and the compatibility of your program with custom normals.
在这种情况下,比较两个应用程序中的低多边形,如果它们看起来不同,请尝试更改导入/导出设置,您正在使用的文件格式(OBJ文件丢失正常信息)以及程序与自定义法线的兼容性。
Problem: how do I make a normal map of a spiky cone?
问题:如何制作尖锥的法线图?
Solution: you... don't. You don't need a normal map for everything.
解决方案:你...不要。您不需要为所有内容提供法线地图。
The spiky cone is a classic example of this, but there are many other places where normal mapping just isn't the solution.
尖锥是这方面的一个经典例子,但还有很多其他地方的法线映射不是解决方案。
We use normal maps to change the normal direction of our low-poly normals. Sometimes, the direction of our normals is perfectly fine and doesn't need any adjustments and sometimes, the normals of our low-poly are extremely bent (such as in the case of a spike) and details from the high-poly don't align with the low-poly surface properly. In these cases, I simply erase the normal map details using this color:
我们使用法线映射来改变低多边形法线的法线方向。有时,我们的法线方向是完全精细的,不需要任何调整,有时,我们的低多边形的法线非常弯曲(例如在尖峰的情况下),并且高多边形的细节与低多边形表面不能正确对齐。在这些情况下,我只是使用以下颜色擦除法线贴图详细信息:
This color is 50% red, 50% green and 100% blue, and doesn't change the normal direction of a tangent space normal map, so you can use it to erase details where the projection isn't good.
此颜色为 50% 红色、50% 绿色和 100% 蓝色,并且不会更改切线空间法线贴图的法线方向,因此您可以使用它来擦除投影不好的细节。
The spiky cone is just an example of one case where normal mapping might not solve your problems. What's important to remember is that there are some cases where a normal map is not the best solution. Normal maps are limited and we can't expect them to do what we need for every situation. Sometimes, we spend a lot of time trying to make a normal map work when we could just add the details to the diffuse texture or the low-poly, and not rely on the normal map for that specific detail.
尖锥只是法线映射可能无法解决您的问题的一个例子。重要的是要记住,在某些情况下,法线图不是最佳解决方案。法线地图是有限的,我们不能指望它们在每种情况下都做我们需要做的事情。有时,我们花费大量时间尝试使法线贴图正常工作,而我们可以将细节添加到漫反射纹理或低多边形中,而不依赖于法线贴图来获取该特定细节。
Problem: the details in my model look inverted.
问题:我的模型中的细节看起来颠倒了。
This is a very common problem and can be seen in a lot of video games, even AAA.
这是一个非常普遍的问题,可以在很多视频游戏中看到,甚至是AAA。
As we saw in the first part of this tutorial, normal maps are textures that use the green, red and blue channels of a texture to change how light reflects from the surface of the model when it comes from the side, top and front respectively (keep in mind this is a simplified explanation and not 100% correct).
正如我们在本教程的第一部分中所看到的,法线贴图是使用纹理的绿色、红色和蓝色通道来更改光线在分别来自侧面、顶部和正面时从模型表面反射的方式(请记住,这是一个简化的解释,而不是100%正确的)。
The problem is, some apps consider that the green channel should show the model as lit from below and some apps consider it should show the model lit from above. This is sometimes referred to as "normal map right-handiness":
问题是,一些应用程序认为绿色通道应将模型显示为从下方点亮,而某些应用程序认为它应该显示从上方点亮的模型。这有时被称为“法线地图右手”:
- OpenGL apps (right-handed, positive green channel): Blender, Maya, Modo, Toolbag, Unity.
- OpenGL应用程序(右手,正绿色通道):Blender,Maya,Modo,Toolbag,Unity。
- DirectX apps (left-handed, negative green channel): 3DStudio Max, CryEngine, Source Engine, Unreal Engine.
- DirectX应用程序(左撇子,负绿色通道):3DStudio Max,CryEngine,Source Engine,Unreal Engine。
- Substance Painter can work with both and export both types of normal maps.
- 物质画家可以同时使用两者并导出两种类型的法线贴图。
Solution: invert the green channel of your normal map. Most game engines will have the option in the textures to invert the normal map, or you can manually invert the green channel of your texture in Photoshop (navigate to the channels tab, select the green channel and press Ctrl+I).
解决方案:反转法线图的绿色通道。大多数游戏引擎都可以在纹理中选择反转法线贴图,或者您可以在 Photoshop 中手动反转纹理的绿色通道(导航到通道选项卡,选择绿色通道,然后按 Ctrl+I)。
Problem: some parts appear flat/missing some detail.
问题:某些零件显得扁平/缺少一些细节。
When baking normal maps, imagine that the baking program casts rays from the surface of your low-poly following your low-poly normals until the rays hit the high-poly and bend. Then, the baking program takes this information and stores it into a normal map.
在烘焙法线贴图时,假设烘焙程序按照低多边形法线从低多边形的表面投射光线,直到光线到达高多边形并弯曲。然后,烘焙程序获取此信息并将其存储到法线贴图中。
The rays that have been cast can't travel forever, because they could hit a faraway part of your high-poly and bend incorrectly, so the baking program limits how far away these rays can be cast and, sometimes, the rays could be stopped before they even hit the high-poly at all. In this case, we lose details and our normal map has zones of flat color.
已经投射的光线不能永远传播,因为它们可能会击中高聚的远处并错误地弯曲,因此烘焙程序限制了这些光线可以投射的距离,有时,光线甚至可以在它们击中高聚之前停止。在这种情况下,我们会丢失细节,并且我们的法线贴图具有平面颜色区域。
Solution: depends on how your baking program lets you control the baking distance:
解决方案:取决于您的烘焙程序如何让您控制烘焙距离:
- Some programs will only look for details outside your low-poly and ignore what's "inside" it (though most modern bakers will look in both directions). In this case, adjust your models so that the low-poly completely fits inside your high-poly.
- 有些程序只会在你的低聚之外寻找细节,而忽略它“里面”的东西(尽管大多数现代面包师会朝两个方向看)。在这种情况下,请调整模型,使低聚完全适合高聚。
- Other programs such as Max will use a cage, an "extruded" version of your low-poly that you can modify to precisely control the limit of the baking process.
- 其他程序(如Max)将使用笼子,这是低聚的“挤压”版本,您可以对其进行修改以精确控制烘焙过程的极限。
- Other programs let you set the baking distance using a number (max frontal and rear distance in Substance Painter).
- 其他程序允许您使用数字(物质画家中的最大前后距离)设置烘焙距离。
You can also try to make the low-poly and/or the high-poly more similar to each other so that the rays can get every detail of your model. Another option is to bake two normal maps using different cage distances and mix them in different parts of your textures. Some normal map purists might scream at you, so tighten your headphones.
您还可以尝试使低多边形和/或高多边形彼此更相似,以便光线可以获得模型的每个细节。另一种选择是使用不同的笼形距离烘焙两个法线贴图,并将它们混合在纹理的不同部分。一些普通的地图纯粹主义者可能会对你大喊大叫,所以要收紧你的耳机。
Problem: my normal map has distorted details.
问题:我的法线贴图有扭曲的细节。
This is a very typical problem. It happens when our low-poly normals don't align properly with the high-poly details, so they appear bent (in reality they are perfectly aligned if you look from the vertex normal direction). This usually happens because you have some faces forming an extreme angle.
这是一个非常典型的问题。当我们的低多边形法线没有与高多边形细节正确对齐时,就会发生这种情况,因此它们看起来是弯曲的(实际上,如果您从顶点法线方向看,它们是完全对齐的)。这通常是因为你有一些脸形成一个极端的角度。
Solution: I wrote more extensively about this topic in the second part of the tutorial, but the general solutions are:
解决方案:我在本教程的第二部分中更广泛地写了有关此主题的文章,但一般解决方案是:
- Soften your extreme angle by adding a bevel.
- 通过添加斜面来软化您的极端角度。
- Convert the edge of your extreme angle into a hard edge/separate the faces into different smoothing groups.
- 将极角的边缘转换为硬边/将面分成不同的平滑组。
- Use custom normals/weighted normals.
- 使用自定义法线/加权法线。
Problem: my normal map looks pixelated or has bands.
问题:我的法线贴图看起来像素化或有波段。
Earthquake (AKA the god of normal maps) wrote a very good explanation of this problem here.
地震(又名法线图之神)在这里写了一个很好的解释。
If your low-poly and high-poly are very similar, most of your normal map will have the base normal map color, with a different color where your low-poly differs from your high-poly.
如果低多边形和高多边形非常相似,则大多数法线贴图将具有基本法线贴图颜色,而低多边形与高多边形不同,则颜色不同。
If we have the opposite situation and your low-poly and high-poly are very different, the normal map will have much higher color variety, and gradients will start to appear:
如果我们的情况相反,而您的低多边形和高多边形非常不同,则法线贴图将具有更高的颜色多样性,并且渐变将开始出现:
These soft gradients are troublesome because we need a lot of colors to represent them, and the most common ways of compressing textures are based on reducing the total number of colors.
这些柔和的渐变很麻烦,因为我们需要大量的颜色来表示它们,而压缩纹理的最常见方法是减少颜色的总数。
Solutions:
解决方案:
1. Make your low-poly more similar to the high-poly: this way, the normal map has to do less work, and it will look more similar to the first image, avoiding these large and soft gradients. Modifying the normals of your low-poly so that they align better with the high-poly could also help.
1.使您的低多边形更类似于高多边形:这样,法线贴图必须做更少的工作,并且它看起来与第一个图像更相似,避免了这些大而柔和的渐变。修改低多边形的法线,使它们更好地与高多边形对齐也可能有所帮助。
2. Use 16-bit normal maps: by default, most images use 8-bit color depth. This means that each color channel of your texture can use 8 different values between 0 and 1. When you consider all 3 color channels, this gives us 256 possible colors.
2. 使用 16 位法线贴图:默认情况下,大多数图像使用 8 位颜色深度。这意味着纹理的每个颜色通道都可以在 0 到 1 之间使用 8 个不同的值。当您考虑所有3种颜色通道时,这为我们提供了256种可能的颜色。
When we have soft gradients we might see bands in our model, because the image doesn't have enough colors to represent such a small change of the color.
当我们有柔和的渐变时,我们可能会在模型中看到条带,因为图像没有足够的颜色来表示如此小的颜色变化。
16-bit images can use 16 different values for each channel, which means up to 65536 possible colors. This provides a lot more range for soft gradients. Be aware that 16-bit images are larger in size than 8-bit ones (because they carry more information). Also, sometimes, 16-bit images have alpha channels and are referred to as 24-bit images.
16 位图像可以为每个通道使用 16 个不同的值,这意味着最多可以有 65536 种颜色。这为柔和的渐变提供了更大的范围。请注意,16 位图像的大小大于 8 位图像(因为它们包含更多信息)。此外,有时,16 位图像具有 Alpha 通道,称为 24 位图像。
There are also images with higher bit depth, but they are not used for normal maps as 16-bit is more than enough.
还有一些图像具有较高的位深度,但它们不用于法线贴图,因为16位绰绰有余。
3. Use dithering: lack of colors in our textures is a problem that has been around for decades, and one solution that appeared long ago was to use dithering. The idea is that we alternate pixels in our texture to represent the gradient, and it works fine when you zoom out on the image. You can usually activate it when exporting your texture.
3.使用抖动:我们的纹理中缺乏颜色是一个已经存在了几十年的问题,很久以前出现的一个解决方案是使用抖动。这个想法是,我们在纹理中交替像素来表示渐变,当您缩小图像时,它可以正常工作。通常可以在导出纹理时激活它。
4. Make sure your normal map is correctly compressed: when textures are compressed, the computer takes zones of a similar color and merges them to create a "patch" of color, reducing the number of colors in your image. This is usually fine for regular images but terrible for normal maps: not only it destroys your gradients but it can also merge the information in your color channels. There are special compression algorithms designed for normal maps. Make sure your game engine is interpreting the image as a normal map (usually by selecting an option in your texture asset to mark it as a normal map) and the compression settings will be configured automatically.
4.确保正确压缩了法线贴图:当纹理被压缩时,计算机会获取相似颜色的区域并合并它们以创建颜色的“补丁”,从而减少图像中的颜色数量。这通常适用于常规图像,但对于法线贴图来说很糟糕:它不仅会破坏渐变,还可以合并颜色通道中的信息。有为法线贴图设计的特殊压缩算法。确保您的游戏引擎将图像解释为法线贴图(通常通过在纹理资源中选择一个选项将其标记为法线贴图),并且将自动配置压缩设置。
Problem: there are some visible pixels on some parts of my model.
问题:我的模型的某些部分有一些可见的像素。
The obvious solution would be to increase the size of your UV island for that part of your model or use larger textures, but let's take a look at some less obvious solutions:
显而易见的解决方案是为模型的该部分增加UV岛的大小或使用更大的纹理,但让我们看一些不太明显的解决方案:
1. Bake your final normal map at double resolution and then reduce the size of your image: Ii you are using a 512x512 texture, bake your normal map at 1024x1024 resolution and then convert the image to 512x512. This way, each pixel of your final texture will take information from 4 pixels, making a sort of "antialiasing" and reducing the pixelation. This is true for other baked images as well, and you will also keep a high-res version of your textures in case you need to increase the detail in some zones later.
1.以双分辨率烘焙最终的法线贴图,然后减小图像的大小:Ii您使用的是512x512纹理,以1024x1024分辨率烘焙法线贴图,然后将图像转换为512x512。这样,最终纹理的每个像素将从4个像素中获取信息,从而形成一种“抗锯齿”并减少像素化。对于其他烘焙图像也是如此,您还将保留纹理的高分辨率版本,以防以后需要在某些区域中增加细节。
Notice how in this image the normal maps have the same resolution, but the one we baked at 1024 looks more rounded and similar to the high-poly because it stored some extra information during the reduction process.
请注意,在此图像中,法线贴图具有相同的分辨率,但是我们在1024处烘焙的法线贴图看起来更圆润,并且与高多边形图相似,因为它在还原过程中存储了一些额外的信息。
2. You can stack your UV islands on top of each other so that they use the same normal map information on different parts of your model. Just make sure you move one side of the model 1 unit outside the UV space so that the baker doesn't try to get details from both sides at the same time. You can go even further and use trim textures or decals for some details to optimize your texture usage.
2. 您可以将 UV 岛堆叠在一起,以便它们在模型的不同部分使用相同的法线贴图信息。只需确保将模型 1 单元的一侧移到 UV 空间之外,这样面包师就不会尝试同时从两侧获取细节。您可以更进一步,使用修剪纹理或贴花来获取一些细节,以优化纹理使用。
3. Textures use a pixel grid, and pixels are square. If you have some details that form a line, try to align this line vertically or horizontally. This way, the pixel grid and your texture details will align.
3. 纹理使用像素网格,像素为正方形。如果您有一些形成线条的细节,请尝试垂直或水平对齐此线条。这样,像素网格和纹理细节将对齐。
Problem: my model is symmetrical, but the normal map looks different depending on the side.
问题:我的模型是对称的,但法线贴图看起来因侧面而异。
When applying symmetry to your model, the normal directions can change because the way the faces are connected has changed. Sometimes, this means that you can see a seam right at the center of your model. To avoid it, make sure your low-poly normals right at the center are aligned and adjust the smoothing if needed.
将对称性应用于模型时,法线方向可能会更改,因为面的连接方式已更改。有时,这意味着您可以在模型的中心看到接缝。为避免这种情况,请确保位于中心的低多边形法线对齐,并根据需要调整平滑度。
Another possible cause is triangulation: when importing models to a game engine, they are always triangulated and sometimes, this process can change the low-poly normals and some artifacts will appear at the diagonal of your low-poly faces. To avoid this, triangulate the model before baking, bake the normal map and then apply the symmetry modifier.
另一个可能的原因是三角剖分:将模型导入游戏引擎时,它们始终是三角化的,有时,此过程可能会更改低多边形法线,并且一些伪影将出现在低多边形面的对角线上。为避免这种情况,请在烘焙前对模型进行三角测量,烘烤法线贴图,然后应用对称修饰符。
Afterword
后记
Finally, here's a small tutorial by Earthquake that helped me understand a little bit more about vertex normals and normal mapping. I talked about the same topics throughout this tutorial series, but I wanted to include it here.
最后,这是 Earthquake 的一个小教程,它帮助我对顶点法线和法线映射有了更多的了解。我在整个教程系列中讨论了相同的主题,但我想将其包含在此处。
Also, check the polycount wiki for more information about normal mapping.
另外,请查看polycount wiki以获取有关法线映射的更多信息。
|