您需要 登录 才可以下载或查看,没有账号?注册

x
Introduction
Hi! I am Pontus Ryman. I've been working as an Environment Artist in the AAA game development industry for close to 12 years now.
I have had an interest in video games and 3D graphics since an early age and since getting hooked, it was always a goal for me to work with 3D art. I started early doing half-life 1 maps in the old hammer editor, moving on to making textures and modding for battlefield 1942, and eventually working on the Black Mesa game when it was still a mod in the Source engine.
Eventually, I studied Digital Graphics, and soon after graduating, I managed to land a position as a 3D Artist at DICE.
介绍
你好!我是Pontus Ryman。我在AAA级游戏开发行业担任环境美术师已经将近12年了。
我从小就对电子游戏和3D图形感兴趣,自从迷上它以来,我一直以3D艺术为目标。我很早就开始在旧的锤子编辑器中制作半衰期1地图,继续为1942年的战场制作纹理和模组,并最终在Source引擎中仍然是Mod的Black Mesa游戏。
最终,我学习了数字图形学,毕业后不久,我设法在DICE获得了3D艺术家的职位。
Spending my first 8 years at DICE and having worked on games such as Battlefield 3,4, and 5 and Star Wars Battlefront 1&2. I've been fortunate enough to have gathered a lot of experience throughout the years, and with the games relying heavily on photogrammetry, I have had the chance to be a part of developing cutting-edge tech and workflows in the field.
我在DICE的前8年,曾参与过《战地3》、《战地3》、《4》和《星球大战:战地风云1&2》等游戏的制作。多年来,我很幸运地积累了很多经验,并且由于游戏严重依赖摄影测量,我有机会成为开发该领域尖端技术和工作流程的一部分。
With the establishment of fully photogrammetry-based environments on Battlefront 1, the core workflows and principles have not really changed since then, only tools and specific gear have really been changed to improve specific steps. Photogrammetry environments in games still benefit from the rule of curating a small but well-built set of photogrammetry content that can cover an entire biomes core visual look across multiple maps. Mix in a few specific elements in each map and you can spice up the same content to create sub-variants of the same environments.
随着在Battlefront 1上建立完全基于摄影测量的环境,从那时起,核心工作流程和原则并没有真正改变,只有工具和特定装备真正被改变以改进特定步骤。游戏中的摄影测量环境仍然受益于管理一组小而完善的摄影测量内容的规则,这些内容可以涵盖跨多个地图的整个生物群系核心视觉外观。在每个地图中混合一些特定元素,您可以为相同的内容添加趣味性,以创建相同环境的子变体。

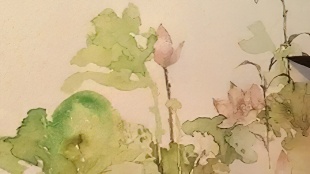
The Forests of Valencia Project
The Forests of Valencia project came about as a follow-up to my last project Summer Archipelago. At the time, I just needed something to do while I was on parental leave. Spending time with our baby has been incredible but I had to have something productive to do in the evenings when my daughter was asleep. My father just bought a house in Spain and we were going there for vacation. I thought why not combine a vacation trip with a photogrammetry project with a theme that differs from the last project but followed the same framework?
瓦伦西亚森林项目
瓦伦西亚森林项目是我上一个项目“夏季群岛”的后续项目。当时,我只是在休育儿假时需要做点什么。花时间和我们的宝宝在一起是不可思议的,但我必须在女儿睡着的晚上做一些富有成效的事情。我父亲刚刚在西班牙买了一套房子,我们要去那里度假。我想为什么不将度假旅行与摄影测量项目结合起来,其主题与上一个项目不同,但遵循相同的框架?
In this project, I wanted to recreate the natural forests in the Valencia region where I captured the content, as I was out and about doing the actual scanning. I also took a lot of references of not just vegetation but also lighting, composition, placement of assets, and even sound.
I would later have a lot of use for these references to accurately assemble the content into a believable world. Some of my shots are even close to 1:1 of the reference images, where the images can almost act as concept art if the composition and lighting are striking enough.
Compared to the last project which was rendered in Unreal Engine 4, I wanted to switch over to 5 to test the new features, especially Lumen which has produced some amazing results.
在这个项目中,我想重现瓦伦西亚地区的天然森林,在那里我捕获了内容,因为我外出并进行实际扫描。我还参考了很多参考资料,不仅包括植被,还包括照明,构图,资产放置,甚至声音。
后来,我对这些引用有很多用处,可以将内容准确地组合成一个可信的世界。我的一些照片甚至接近参考图像的1:1,如果构图和照明足够引人注目,图像几乎可以作为概念艺术。
与上一个在虚幻引擎4中渲染的项目相比,我想切换到5来测试新功能,特别是Lumen,它产生了一些惊人的结果。

Equipment
The equipment I used was quite a basic set of cameras and supporting gear and was based on the kit we had used when going on photogrammetry trips for the AAA games i have worked on.
设备
我使用的设备是一套非常基本的相机和支持设备,并且基于我们在为我从事的AAA游戏进行摄影测量旅行时使用的套件。
The main kit includes:
Canon 6D MKII;
X-rite Color Checker Passport;
24mm lens with image stabilizer for the majority of the scanning;
70-200mm lens with image stabilizer for references and scanning at a distance;
Tripod
主套件包括:
佳能6D MKII;
X-仪式彩色检查护照;
24mm镜头带图像稳定器,用于大部分扫描;
70-200mm镜头,带图像稳定器,用于参考和远距离扫描;
三脚架
I also had a large white cloth of non-reflective fabric, sturdy and easy to clean, and a small blue cloth of non-reflective fabric, sturdy and easy to clean.
This time, I also took some extra gear which I do not always bring but can be handy at times:
Canon 750D;
18-55 mm lens with image stabilizer;
Polarizing Lens cap;
Gorilla tripod.
我还有一块大白布的无反光布,坚固易清洁,还有一块蓝色的小布非反光布,结实易清洁。
这一次,我还带了一些额外的装备,我并不总是带上,但有时可以很方便:
佳能750D;
18-55 mm镜头,带图像稳定器;
偏光镜片盖;
大猩猩三脚架。
In-engine collection of some of the gear:
发动机内收集一些档位:
This is the kit I use but photogrammetry these days can be done with any type of camera and the cost of getting into using the technology is significantly lower than a few years ago.
If there is any one piece of gear I would recommend getting then it is the color chart, having a correct color reference for your scanned assets is incredibly valuable once you start to build up a library of similar assets.
这是我使用的套件,但现在摄影测量可以使用任何类型的相机完成,并且使用该技术的成本比几年前要低得多。
如果我建议获得任何一件装备,那么它就是彩色图表,一旦您开始建立类似资产的库,为扫描的资产提供正确的颜色参考是非常有价值的。
A simple but effective kit:
简单但有效的套件:
Lighting Conditions
When scanning the rule of thumb is to always avoid scanning in sunlight or in rain/wet weather. While scanning in sun is possible it introduces a whole lot of cleanup work in the content creation phase that sometimes simply cannot be cleaned up in a good way and will leave artifacts. So avoid the sun altogether if possible and stick to the shadows!
照明条件
扫描时,经验法则是始终避免在阳光下或雨/湿天气下扫描。虽然可以在阳光下扫描,但它在内容创建阶段引入了大量的清理工作,有时根本无法以良好的方式清理并留下伪影。因此,如果可能的话,完全避免阳光,并坚持阴影!
Wet weather can cause reflections from different angles and should be avoided since it can throw off the photogrammetry software alignment. A wet surface is also darker than a dry surface in the Albedo since the surface has soaked up the water, which does not accurately represent the right values you want for a balanced scene.
The best possible scenario is an overcast sky, this will give an even lighting condition without any color bounce from any nearby surface. While you can scan in shade or during a temporary cloud coverage, during a sunny day there can be shifts in the color cast on objects through indirect lighting. Generally, this is not a big issue and a color chart image can help calibrate this correctly, but it's good to keep in mind.
潮湿的天气会导致来自不同角度的反射,应避免使用,因为它可能会破坏摄影测量软件的对齐方式。在反照率中,潮湿的表面也比干燥的表面更暗,因为表面已经吸收了水,这并不能准确地表示平衡场景所需的正确值。
最好的情况是阴天,这将提供均匀的照明条件,而不会从任何附近的表面反弹任何颜色。虽然您可以在阴影下或临时云层覆盖期间进行扫描,但在阳光明媚的日子里,通过间接照明可以改变物体上的色偏。通常,这不是一个大问题,彩色图表图像可以帮助正确校准,但最好记住。
Capturing Content
Capturing photogrammetry content is a fairly straightforward process and the basics are easy to understand: take a lot of images from every possible angle of a real-life object so that the photogrammetry software can match up the images to create a 3D point cloud and generate mesh and textures from it.
In my process, I used the equipment I talked about earlier, and RealityCapture is always my software of choice when it comes to running the images through for a 3D model.
When capturing content there are a few key things to be mindful of, and while they are easy in concept, a mix of circumstances can make it challenging to uphold some of them.
捕获内容
捕获摄影测量内容是一个相当简单的过程,基础知识很容易理解:从现实生活对象的每个可能角度拍摄大量图像,以便摄影测量软件可以匹配图像以创建3D点云并从中生成网格和纹理。
在我的过程中,我使用了我之前谈到的设备,而RealityCapture始终是我为3D模型运行图像的首选软件。
在捕获内容时,有一些关键事项需要注意,虽然它们在概念上很容易,但各种情况的混合可能会使维护其中一些内容变得具有挑战性。
These key things are:
Keep your images as sharp as possible, with high shutter speed and high f-stop values, preferably low ISO;
Cover the asset with as many images and angles as possible;
Make sure the asset captured is not moving in any way between images;
Check the histogram so you do not hit absolute black or absolute white, there will not be any information to gather in these parts of the images if it does and you cannot compensate when calibrating the images before running it;
Always take an image of a color chart with your asset.
这些关键是:
保持图像尽可能清晰,具有高快门速度和高光圈值,最好是低ISO;
用尽可能多的图像和角度覆盖资产;
确保捕获的资产不会在图像之间以任何方式移动;
检查直方图,这样您就不会击中绝对黑色或绝对白色,如果有的话,则不会在图像的这些部分中收集任何信息,并且在运行之前校准图像时无法进行补偿;
始终使用资产拍摄彩色图表的图像。
Sharpness is incredibly important for the alignment of the images and will also affect the detail quality of the high poly mesh that is generated. Generally, this means having the correct focus point when scanning and also keeping your F-stop away from lower numbers. I usually try to stick between 9-11 on my Canon 6D. It can be hard to keep the F-stop high, however, as lower numbers give you a brighter image in low light situations, and balancing it with a higher ISO can introduce noise which is not preferable for your image.
A lower shutter speed can give you a brighter image as well since it will let in more light into the lens but that introduces risk in terms of sharpness loss since you are likely to have micro-movements of your hand while taking images. If in very low light situations it is recommended to use a tripod that can help stabilize with a low shutter speed. Scanning an object can take longer but it's important to stick to the sharpness rule as much as possible.
清晰度对于图像的对齐非常重要,并且还会影响生成的高多边形网格的细节质量。通常,这意味着在扫描时要有正确的对焦点,并且还要使F-stop远离较低的数字。我通常尝试在佳能6D上坚持9-11。然而,很难将光圈值保持在高位,因为在低光照条件下,较低的数字会给你一个更亮的图像,而用较高的ISO来平衡它可能会引入噪点,而这对你的图像来说并不可取。
较低的快门速度也可以为您提供更明亮的图像,因为它会让更多的光线进入镜头,但这会在清晰度损失方面带来风险,因为您在拍摄图像时可能会出现手部的微运动。如果在非常低的光线下,建议使用三脚架,以便在低快门速度下帮助稳定。扫描物体可能需要更长的时间,但尽可能坚持清晰度规则非常重要。
With a lower shutter speed, there is a risk of movement blurring
For hand-held scanning, I avoid going below 200 in shutter speed, and if I need to move the camera away from a position where I can look through the lens (when I need to photograph hard-to-reach places like high above my head or low to the ground) I try to keep it even higher, as keeping the camera steady becomes even harder.
It is possible to make up for lower sharpness images with a lot of image coverage/overlap, at least when it comes to alignment, but the smaller details will still not come out right if many of those images are still not sharp.
使用较低的快门速度,存在移动模糊的风险
对于手持扫描,我避免在快门速度下低于200,如果我需要将相机从可以通过镜头观察的位置移开(当我需要拍摄难以到达的地方,如头顶上方或低到地面时),我会尽量保持更高,因为保持相机稳定变得更加困难。
至少在对齐方面,可以弥补具有大量图像覆盖/重叠的较低清晰度图像,但是如果其中许多图像仍然不清晰,则较小的细节仍然无法正确显示。
It's a good thing to keep in mind that if a feature or shape of an asset being scanned does not exist in any photo, it will never exist on the generated 3D mesh, there have to be more than at least a few images of each feature for it to be created. Nothing unique will be "generated" from extrapolation or procedural solutions in RealityCapture or other photogrammetry software, only stretched textures and flat geo will bridge empty pockets of missing information at the most.
Scanning vegetation is its own beast and requires a different approach. I lay out vegetation on a large white cloth as they will be intended in the engine as alpha cards in order to either scan them directly or use them as a reference for the creation of the alpha cards.
请记住,如果正在扫描的资产的特征或形状在任何照片中都不存在,那么它永远不会存在于生成的3D网格上,因此必须至少存在每个特征的多个图像才能创建它。在RealityCapture或其他摄影测量软件中,外推或程序解决方案不会“生成”任何独特的东西,只有拉伸的纹理和平坦的地理区域最多可以弥合缺失信息的空口袋。
扫描植被本身就是野兽,需要不同的方法。我在一块大白布上铺设植被,因为它们将在引擎中作为阿尔法卡,以便直接扫描它们或将它们用作创建阿尔法卡的参考。
Sometimes using a blue cloth sheet can be efficient as it's easier to mask out in Photoshop, but the blue color can also cause problematic blue light bouncing up on the vegetation that is placed on the board. I have gone through trial and error and opted for white over blue or black sheets but it's really up to taste here. A black sheet is easier to mask and does not bounce blue onto the subject but it can become very dark instead making capturing harder.
有时使用蓝色布板可能很有效,因为它在Photoshop中更容易遮罩,但蓝色也会导致有问题的蓝光在放置在板上的植被上反弹。我经历了反复试验,选择了白色而不是蓝色或黑色床单,但在这里真的可以品尝到。黑色的纸张更容易遮盖,并且不会将蓝色反射到主体上,但它可能会变得非常暗,而是使捕获更加困难。
Larger leaves and thicker sticks are easier to scan directly as the photogrammetry software has more clear details to align to, so I try to get a 3D mesh scan out of those directly, it will save a lot of time and the quality is always better but when there is vegetation with thinner details such as pine-like trees and bushes or grass, the risk of them moving in the wind while scanning or just that they are too thin can create a lot of issues in the final 3D model. In these cases, I use just a top-down image as a reference and then high poly model the branch in Blender. Sometimes the branch can be scanned but the thinner ends of a branch do not turn out well, in these cases a manually made high poly model can be created and then baked down and combined with the scanned part of the branch.
较大的叶子和较厚的棍子更容易直接扫描,因为摄影测量软件具有更清晰的细节来对齐,所以我尝试直接从这些中取出3D网格扫描,这将节省大量时间并且质量总是更好,但是当有植被具有较薄的细节时,例如松树状的树木和灌木丛或草, 它们在扫描时在风中移动的风险,或者只是它们太薄的风险会在最终的3D模型中产生很多问题。在这些情况下,我只使用自上而下的图像作为参考,然后在Blender中对分支进行高多边形建模。有时可以扫描分支,但分支的较薄末端效果不佳,在这些情况下,可以创建手动制作的高多边形模型,然后将其烘烤并与分支的扫描部分组合。
Running Your Assets in Reality Capture and Cleanup
When creating the content from a photogrammetry scan there are a few steps to clean the asset and prepare it for in-engine use.
在现实中运行资产捕获和清理
从摄影测量扫描创建内容时,只需执行几个步骤即可清理资源并准备在引擎内使用。
The amount of cleaning and prepping is dependent on how good the scan is and in which condition the scan was taken in. In the best-case scenarios, there is barely any cleanup to do at all.
The first step is to calibrate the images based on your color chart. The most straightforward way to do this is to simply white balance towards the white points on your color charts, this is a quick and easy way to put your asset in a good ballpark. However, if you want to get very exact calibration, calibrating towards the entire color chart color swatch is preferred.
清洁和准备的量取决于扫描的好坏以及扫描的状况。在最好的情况下,几乎不需要进行任何清理。
第一步是根据颜色图表校准图像。最直接的方法就是简单地对彩色图表上的白点进行白平衡,这是一种快速简便的方法,可以将您的资产放在一个好的球场上。但是,如果要获得非常精确的校准,则最好针对整个彩色图表色板进行校准。
Exact calibration can be valuable if you have complex colors in your scans that cross multiple assets, such as rocks with gradients of strong color and if they are captured in different lighting conditions (even in shadow, the surrounding lighting condition can cast colored bounce light).
如果扫描中有跨越多个资产的复杂颜色,例如具有强烈颜色渐变的岩石,并且如果在不同的照明条件下捕获它们(即使在阴影中,周围的照明条件也会投射彩色反射光),则精确校准可能很有价值。
While calibrating and aligning colors comes a good opportunity to remove some of the brightest and darkest parts of an image, this will help even out the albedo to a more mid-gray value
When the images have been calibrated, it's time to run the asset in your photogrammetry tool, in this case, RealityCapture.
虽然校准和对齐颜色是删除图像中一些最亮和最暗部分的好机会,但这将有助于将反照率均匀到更中灰度的值
校准图像后,即可在摄影测量工具(在本例中为 RealityCapture)中运行资产。
For the most part, I just run on medium image overlap in the align settings, if the asset for some reason does not align all the images, testing out the different align options can be useful, and also trying to use the down-res option for the images – it may help the alignment find other images and can sometimes resolve issues and connect detached components.
If this still does not work, and you by some lucky shot managed to have extra images of the same asset in the background when scanning another asset nearby, try adding those extra images into the mix, it might be just what's needed for RealityCapture to find and align the components.
在大多数情况下,我只是在对齐设置中的中等图像重叠上运行,如果资源由于某种原因没有对齐所有图像,测试不同的对齐选项可能很有用,并且还尝试对图像使用down-res选项 - 它可能有助于对齐找到其他图像,有时可以解决问题并连接分离的组件。
如果这仍然不起作用,并且您通过一些幸运的镜头在扫描附近的另一个资产时设法在后台获得了相同资产的额外图像,请尝试将这些额外的图像添加到组合中,这可能正是RealityCapture查找和对齐组件所需的。
I run my models on High Detail from the point cloud to 3D mesh to get the most out of the asset, while the quality difference between normal and high is variable depending on your scan. I usually run at High just to be on the safe side.
When the High model is done, it's time to trim and filter out excess geo that will not be needed. There is 2 reasons to do this:
我在高细节上运行我的模型,从点云到3D网格,以充分利用资源,而正常和高之间的质量差异根据您的扫描而变化。我通常跑到高处只是为了安全起见。
完成高模型后,是时候修剪和过滤掉不需要的多余地理区域了。这样做有 2 个原因:
You don't need that geometry cost when the mesh is exported, this can shave off millions of triangles, it will also make it easier to work with outside of RealityCapture;
If the model will be UV-mapped and textured, the more UV space for the area you will bake from the better. This point does not, however, matter if you bake from Vertex Colors.
导出网格时,您不需要几何体成本,这可以减少数百万个三角形,这也将使在RealityCapture之外更容易使用;
如果模型将进行 UV 贴图和纹理处理,则烘焙区域的 UV 空间越大越好。但是,如果您从顶点颜色烘焙,这一点并不重要。
Once filtering is done I bake the texture to the high poly, either as an UVed high poly to an actual image texture (at the highest resolution possible) or to Vertex Colors, its case by case but more often than not I use Vertex Colors. Sometimes baking before the filtering can be useful if vertex color is the preferred method and I am unsure where and what to filter out, this gives some backstepping flexibility if needed.
After that, I export it to a .PLY and call it _HIGH, and then decimate the model down to 200-500k tris (higher numbers for assets with more complex geo shapes that need representation) and export that as a _MID.ply. Further filtering can be done here if I know exactly what my low poly will look like and skirt extensions will be added later.
过滤完成后,我将纹理烘焙到高多边形,要么作为UV高多边形到实际的图像纹理(以尽可能高的分辨率)或到顶点颜色,它的具体情况,但我经常使用顶点颜色。有时,如果顶点颜色是首选方法,并且我不确定过滤位置和内容,则在过滤之前进行烘焙会很有用,如果需要,这可以提供一些回溯灵活性。
之后,我将其导出到.PLY并将其称为_HIGH,然后将模型抽取到200-500k tris(对于具有需要表示的更复杂地理形状的资产,数字更高),并将其导出为_MID.ply。如果我确切地知道我的低多边形会是什么样子,并且稍后将添加裙部扩展,则可以在此处进行进一步的过滤。
This _MID model is used as a reference for the low poly creation as the high poly mesh can be too big for other software to handle.
此_MID模型用作低多边形创建的参考,因为高多边形网格可能太大,其他软件无法处理。
At this stage, it's time to make a low poly to bake from. It's up to the user how to make the low poly over the MID as a reference – you can either opt for a procedural solution in Houdini, use a subdivided mesh from RealityCapture that is then cleaned up and UV-mapped, do your low poly in the preferred 3D app, or use the more manual but more accurate approach in TopGun for example. There is no right or wrong in terms of choice of approach. A regular low poly that represents the shape which we will bake to is what we are after. I tend to use a mix of RealityCapture decimation that I clean up in Blender, depending on the complexity of the mesh.
I usually stick to "game-friendly" budgets and not movie/VFX budgets in terms of triangle count cost relative to objects size, while the content in this project is not meant for any one particular game or game type, I still kept within budgets learned from AAA experience and looked at the shape of the asset and give more triangles where the geometry is more complex.
在这个阶段,是时候制作一个低聚物来烘烤了。这取决于用户如何制作MID上的低多边形作为参考 - 您可以选择Houdini中的程序解决方案,使用RealityCapture的细分网格,然后进行清理和UV映射,在首选的3D应用程序中做低多边形,或者在TopGun中使用更手动但更准确的方法。在方法的选择方面没有对错之分。一个普通的低聚体,代表我们将要烘烤的形状是我们所追求的。我倾向于使用我在Blender中清理的RealityCapture抽取的混合,这取决于网格的复杂性。
我通常坚持“游戏友好”预算,而不是相对于对象大小的三角形计数成本的电影/VFX预算,虽然这个项目中的内容不适用于任何一个特定的游戏或游戏类型,但我仍然保持在从AAA经验中学到的预算范围内,并查看了资产的形状,并在几何体更复杂的地方给出了更多的三角形。
Once the low poly is created, it's worth taking a look at the asset to see if it needs a cap (filling in the empty spot underneath if close to a solid shape) or if it needs a skirt extension in the case of a ledge or rock wall.
These skirt extensions are meant to help merge the asset into the terrain and into other assets better. Where the skirt extends will then later artificially be textured through a tiling texture by masking in a surface. This skirt can also, if that approach is used, work as a bridging area for Virtual texture blending. I usually just extrude the skirt straight backward or try to follow the angle of how the ground extended on the real-world asset. This area does not need to have perfect geometry as it is usually covered with other geometry from other assets, but should not have any obvious mesh issues either.
创建低多边形后,值得查看资产以查看它是否需要盖子(如果接近固体形状,则填充下面的空点),或者在壁架或岩壁的情况下是否需要裙边延伸。
这些裙边延伸旨在帮助将资产更好地合并到地形中并与其他资产中。裙子延伸的地方稍后将通过表面遮罩来人工通过平铺纹理进行纹理处理。如果使用这种方法,这条裙子也可以作为虚拟纹理混合的桥接区域。我通常只是将裙子向后直接拉伸,或者尝试跟随地面在现实世界资产上如何延伸的角度。此区域不需要具有完美的几何体,因为它通常被来自其他资源的其他几何体覆盖,但也不应该有任何明显的网格问题。
With a UV-mapped low poly, it's over to baking the maps.
As mentioned before, I often use .ply for the models because I will be baking Vertex Color to the diffuse low poly, while the highest texture quality you can get is to bake a texture to a UV on the high poly model. I still go for a .ply with Vertex Color as I know, down the line I will manipulate the texture and size it down to a game-friendly standard together with detail textures layered on, the highest resolution texture possible from the high poly bake for the albedo will not be too noticeable anymore because of this.
使用UV贴图的低聚体,就可以烘烤贴图了。
如前所述,我经常使用.ply作为模型,因为我将顶点颜色烘焙到漫反射低多边形,而您可以获得的最高纹理质量是在高多边形模型上将纹理烘焙到UV。我仍然会选择.ply与顶点颜色,因为我知道,沿着这条线,我将操纵纹理并将其大小缩小到游戏友好的标准以及分层的细节纹理,由于这个原因,从高多边形烘焙中获得的最高分辨率纹理将不再太明显。
If you are after the highest possible resolution for a single asset, however, baking from a UVed high poly is the way to go.
I bake the Color, AO, Height, Cavity, and Normal (Tangent- and sometimes an Object-Space Normal, if needed for any cleanup or specific in engine cases). With a baked low poly, the asset can either be ready for importing into the engine or it can require some texture cleanup.
但是,如果您追求单个资产的最高分辨率,那么从UV高多边形烘焙是要走的路。
我烘烤颜色,AO,高度,腔体和法线(切线 - 有时是对象空间法线,如果需要任何清理或在发动机情况下特定)。使用烘焙的低多边形,资源可以准备好导入引擎,也可以需要一些纹理清理。
There are two main things to look for when cleaning up.
The first is Broken/Blurry spots on the mesh where there was missing info. These areas are often easy to clean by setting up a clone stamping layer in Substance 3D Painter and simply sourcing all the channels (Albedo, Height, AO, Normal, etc..) from another source on the mesh and clone stamping it onto the broken and missing areas.
清理时要注意两个主要事项。
第一个是网格上缺少信息的破碎/模糊点。通过在 Substance 3D Painter 中设置克隆冲压层,并简单地从网格上的另一个来源获取所有通道(反照率、高度、AO、Normal 等),并将其克隆冲压到破碎和缺失区域,通常很容易清洁这些区域。
The second is lighting information removal. If there is heavy AO darkness in cavities, it can be countered using a baked AO as a mask to brighten up the darkest spots, or if the asset has an even color you can invert the color and grayscale it and use that as a brightening mask, although it's generally not the best approach, but can help if an AO isn't matching where the dark areas on the Albedo are.
For strong lighting in your textures (if the asset was scanned in strong sunlight) – this is the hardest of the lighting artifacts to get rid of and can require quite a bit of work – I recommend Agisoft De-Lighter. It does a good job at finding and delighting overly strong sunlight. The best way to counter this issue is however to not have scanned in strong sunlight at all.
二是照明信息去除。如果空腔中存在严重的AO暗度,则可以使用烘焙AO作为遮罩来使最暗的斑点变亮,或者如果资源具有均匀的颜色,则可以反转颜色并将其灰度并将其用作增亮蒙版,尽管这通常不是最佳方法,但如果AO与反照率上的黑暗区域不匹配,则可以提供帮助。
对于纹理中的强光照(如果资源是在强烈的阳光下扫描的) - 这是最难摆脱的光照伪像,可能需要相当多的工作 - 我推荐Agisoft De-Light。它在发现和愉悦过于强烈的阳光方面做得很好。然而,解决这个问题的最好方法是根本不在强烈的阳光下进行扫描。
Using the Content In-Game
After the cleanup is done is just a matter of exporting to Unreal Engine. At this stage in my project, I had master shaders and an import pipeline established from my last project with some minor updates and optimizations added.
Overall the important part here is to get to the point where a master shader covers your needs for the assets in a set. In a natural setting, for example, all rocks will use the same set of detailed textures and if present, skirt extension materials. My nature shader also covered the unpacking of the textures and contact shadow adjustment options.
在游戏中使用内容
清理完成后,只需导出到虚幻引擎即可。在我的项目的这个阶段,我从上一个项目建立了主着色器和导入管道,并添加了一些小的更新和优化。
总体而言,这里重要的部分是达到主着色器满足您对集合中资源的需求的程度。例如,在自然环境中,所有岩石都将使用相同的一组细节纹理,如果存在,则使用裙部延伸材料。我的自然着色器还涵盖了纹理的解包和接触阴影调整选项。
With a master shader in place, it becomes very efficient to produce content through the entire "Scan – RealityCapture – Cleanup – Import" pipeline and you can quickly produce a lot of content.
The Normal map and diffuse texture usually get a slight detail blurring pass where I smooth out the smallest details because the detail textures will replace these details, leaving them in can cause quality conflicts, and blurring the texture actually makes it look better when combined with detail textures. The win here is that the texture can also be sized down to save on texture space.
I do texture packing and detail texture "slice" masks at this stage, where I pack the Color and masks into RGB + A and Normal Roughness and Height into an RG+B+A setup.
有了主着色器,通过整个“扫描 - 现实捕获 - 清理 - 导入”管道生成内容变得非常高效,您可以快速生成大量内容。
法线贴图和漫反射纹理通常会获得轻微的细节模糊传递,其中我平滑了最小的细节,因为细节纹理将取代这些细节,留下它们可能会导致质量冲突,而模糊纹理实际上会使它与细节纹理结合使用时看起来更好。这里的好处是纹理也可以缩小大小以节省纹理空间。
在此阶段,我进行纹理打包和细节纹理“切片”蒙版,我将颜色和蒙版打包到RGB + A中,并将“正常粗糙度”和“高度”打包到RG + B + A设置中。
The "slice" mask is basically just a black/white image where a grayscale value will map a detail texture from a texture array onto a specific surface. In my case for a ledge asset, white will mask where a top-down surface layer of pine will mask in, this is driven in the shader where it will clamp the highest white and consider anything below white as black and then mask in the pine surface. Bright white (not full-white, but close to it), gray and black will mask in smooth, rough, and very coarse rocky detail textures on an asset.
“切片”蒙版基本上只是一个黑白图像,其中灰度值会将纹理数组中的细节纹理映射到特定表面上。在我的情况下,对于ledge资产,白色将遮罩自上而下的松树表面层,这是在着色器中驱动的,它将夹紧最高的白色,并将白色以下的任何内容视为黑色,然后在松树表面进行遮罩。明亮的白色(不是全白,但接近全白)、灰色和黑色将遮盖资产上光滑、粗糙和非常粗糙的岩石细节纹理。
Once the asset is imported it's just a matter of using it! When the asset is in I usually try to test the shape a bit and see if I need to bend the asset slightly to make it more useful or adjust any textures to align better with the other assets. Calibration in the start usually gets the textures so close to the correct value that this is not always needed, but a real-life rock might still look a bit off from the majority of the other rocks scanned for the set, so bringing them closer to each other is worth doing even if it can potentially stray slightly away from the "actual" colors.
导入资产后,只需使用它即可!当资源处于其中时,我通常会尝试稍微测试一下形状,看看我是否需要稍微弯曲资源以使其更有用,或者调整任何纹理以更好地与其他资源对齐。在开始时进行校准通常使纹理非常接近正确的值,这并不总是必需的,但是现实生活中的岩石可能仍然看起来与为该集合扫描的大多数其他岩石有点偏差,因此即使它们可能稍微偏离“实际”颜色,也值得一试。
Conclusion
When working with photogrammetry and sets of natural biomes in RealityCapture and Unreal, the most important aspect overall is to make sure that everything fits together.
Scanning everything from the same location, making sure that the assets are scanned in similar lighting conditions (overcast being preferred), that every asset is always scanned with a color chart for reference, and that different sizes of assets in a set are captured.
结论
在RealityCapture和Unreal中使用摄影测量和自然生物群系集时,最重要的方面是确保所有内容都适合在一起。
从同一位置扫描所有内容,确保在相似的照明条件下扫描资源(最好是阴天),始终使用彩色图表扫描每个资源以供参考,并捕获集合中不同大小的资源。
When a good set of assets are captured in the field, it's quite straightforward to establish a production line of sorts that moves assets through calibration, alignment, 3D mesh, and texturing in RealityCapture and then low poly baking to in engine result. You can efficiently get quite a large amount of content for a nature biome if the base setup and process for every step has been established for one asset, making a whole environment efficient to produce.
Big thanks to 80 Level for letting me do this breakdown, I had a lot of fun making this project, and it's been great to be able to share a part of that process.
当在现场捕获一组好的资产时,建立一条生产线非常简单,该生产线通过RealityCapture中的校准,对齐,3D网格和纹理移动资产,然后在引擎结果中进行低多边形烘焙。如果为一个资产建立了每个步骤的基本设置和流程,则可以有效地为自然生物群系获取相当多的内容,从而使整个环境有效地生产。
非常感谢80 Level让我做这个分解,我在做这个项目时玩得很开心,能够分享这个过程的一部分真是太好了。
|


 评分
评分