Introduction
My name is Hung Nguyen, I love doing art and playing video games, I’m from Ha Noi, Vietnam, I’m currently a freelancer with over 4 years of experience in the Games Industry. I have had experience across the board with character, environment and prop art.
介绍
我叫 Hung Nguyen,我喜欢做艺术和玩电子游戏,我来自越南河内,我目前是一名在游戏行业拥有超过 4 年经验的自由职业者。我在角色、环境和道具艺术方面拥有全面的经验。
Inspiration and References
At this time, there are so many games that have Japanese style such as Sekiro, Nioh 2, Ghost of Tsushima. All of them inspire me so much. It was what motivated me to do a Japanese-style character. This katana is a part of my project.
The references are very important, to push me in the right direction. I usually find images by searching on Google, Pinterest and sometimes if that doesn’t have enough information, I watch some videos on Youtube then take some screenshots. I use Pureref to manage my image references.
灵感和参考
这个时候,有许多具有日本风格的游戏,如《只狼》、《仁王 2》、《对马之魂》等。他们都给了我很大的启发。这是我创作日式角色的动力。这把武士刀是我项目的一部分。
参考资料非常重要,可以将我推向正确的方向。我通常通过在 Google、Pinterest 上搜索来查找图片,有时如果没有足够的信息,我会在 Youtube 上观看一些视频,然后截取一些屏幕截图。我使用 Pureref 来管理我的图像引用。
Planning
My plane is doing with the normal pipeline, I did every project. I block out in Maya, then sculpt details in Zbrush, go back Maya to retopology, after that bake texture in Marmoset. Texturing is in Substance Painter. Finally, I render in Marmoset toolbag 4.
规划
我的每一个项目做法都中规中矩。我在 Maya 中定型,然后在 Zbrush 中雕刻细节,在 Marmoset 中烘焙纹理之后,将 Maya 返回到重新拓扑。纹理在 Substance Painter 中。最后,我在 Marmoset 工具包 4 中渲染。
Blockout/Modelling
The blocking was made in Maya. I imported the reference image in this scene, then made sure the katana model was fit with it.
定型/建模
定型是在 Maya 中制作的。我在这个场景中导入了参考图像,然后确保武士刀模型适合它。
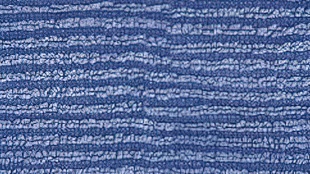
All of object I will add details surface already have UV before import in Zbrush. Example the fabric below:
在 Zbrush 中导入之前,我将添加细节表面的所有对象都已经具有 UV。以下面的面料为例:
Sculpting
Once I was happy with the blockout, I then imported it into ZBrush. I have so much freedom to create details in there, I really love sculpting in Zbrush.
雕刻
一旦我对封锁感到满意,我就将它导入到 ZBrush 中。我有很大的自由来创造细节,我真的很喜欢在 Zbrush 中雕刻。
Tips
I want to share with you some very helpful ZBrush tips, down below.
尖端
我想在下面与您分享一些非常有用的 ZBrush 技巧。
For the surface details, I used Surface Noise in ZBrush, let me remind you that the object already has UV’s.
对于表面细节,我在 ZBrush 中使用了 Surface Noise,让我提醒您对象已经具有 UV。
I generated a tile noise surface using Substance Designer.
我使用 Substance Designer 生成了平铺噪声表面。
Retopology
After the highpoly was done in ZBrush, I decimated every object around 20% then export them for baking. Meanwhile, I always have another version for retopology at around 5% of decimation. There are many software that can do retopology, but Maya is the best for me.
The UI is friendly and I can adjust low-poly and UVs at the same time.
重拓扑
在 ZBrush 中完成 highpoly 后,我将每个对象抽取 20% 左右,然后将它们导出进行烘焙。同时,我总是有另一个版本的重新拓扑,大约为 5%。有很多软件可以做重拓扑,但对我来说 Maya 是最好的。
UI 很友好,我可以同时调整低多边形和 UV。
UV Mapping
The UV of my Katana is a bit specific because the ratio is not fit with square mapping. It is reasonable with a 4069×2048.
紫外线映射
我的 Katana 的 UV 有点特殊,因为该比例不适合方形贴图。4069×2048是合理的。
Small tip, I used Layout UVs to change the Packing Region. Automatically, the UV islands had been arranged nicely with the same pixel.
*Notice: Before using the Layout Uvs, I have to arrange it a bit.
When I was happy with UV, I scaled it to square. Then, it was all ready for baking.
小提示,我使用 Layout UVs 来更改 Packing Region。自动地,UV 岛已经用相同的像素很好地排列了。
*注意:在使用Layout Uvs之前,我必须稍微安排一下。
当我对 UV 感到满意时,我将其缩放为正方形。然后,一切准备就绪,可以烘烤了。
Baking
I used Marmoset Toolbag for baking, changed the resolution of the texture set to 4096×2048.
烘烤
我使用 Marmoset Toolbag 进行烘焙,将纹理设置的分辨率更改为 4096×2048。
Texturing
This part I like the most, after a massive step. I give myself some time to chill, I look at the references then play with color, roughness and metallic channels.
纹理
在迈出一大步之后,我最喜欢这部分。我给自己一些时间冷静下来,我查看参考资料,然后使用颜色、粗糙度和金属通道。
Small tip, using ID mapping is very useful. I baked the ID map in Marmoset using by ID object.
小技巧,使用ID映射很有用。我使用 by ID 对象在 Marmoset 中烘焙了 ID 地图。
Honestly, the material that comes out of Substance Painter is not accurate in the render of Marmoset. I always render and adjust textures at the same time, to make sure they are.
老实说,来自 Substance Painter 的材质在 Marmoset 的渲染中并不准确。我总是同时渲染和调整纹理,以确保它们是。
Rendering
I used Unreal Engine 4 template to export texture.
渲染
我使用虚幻引擎 4 模板导出纹理。
When I import everything into the Marmoset scene, I had to change the R, G, B channels of the texture.
R: Ambient Occlusion
G: Roughness
B: Metalness
当我将所有内容导入 Marmoset 场景时,我不得不更改纹理的 R、G、B 通道。
R:环境遮挡
G:粗糙度
B:金属性
The lighting, I set up is basic. Three-point lighting is the key light, fill light and a rim light.
我设置的照明是基本的。三点照明是主光、补光和边缘光。
Small trick, try to adjust the light so that it highlights the edges. This way your model will look more defined and realistic.
小技巧,尝试调整光线,使其突出边缘。这样,您的模型将看起来更加明确和逼真。
Conclusion
Thanks to everyone who has finished reading my article. I hope you learnt something new. I have so many things to share, but it is very difficult to write all of them in this article.
It is an honor and pleasure to share with you my artwork and experiences. Thanks to the GamesArtist team for reaching out to me, I really appreciate it.
Thanks to Hung for allowing us to have such an in-depth look at his process.
结论
感谢所有读完我文章的人。我希望你学到了一些新东西。我有很多东西要分享,但很难在这篇文章中全部写出来。
很荣幸与您分享我的艺术作品和经验。感谢 GamesArtist 团队与我联系,我真的很感激。
感谢 Hung 让我们如此深入地了解他的过程。