元素首页
AIGC
网站公告
手机版首页
最新元素
我的关注
我的足迹
教程学习
模型资源
元素导航
元素精华
元素APP
元素推荐
天梯评级排行
发布原创作品
元素大师堂
微库
特效库
微库空间
我的上传
最新建设
最新图片
微币兑换
微库特权装备
微·元音
正版授权
文章
公告
问答
悬赏
热门
词库
AIGC论坛
游戏推荐
画板
我的画板
收藏画板
活动与公告
美术资源
教程专区
游戏引擎
技术美术
模型专区
软件工具
在线工具
AI工具
装备中心
元素悬赏
勇士公会
元素任务
矿场任务
微库奖励
余额充值
VIP年卡/装备
VIP装备指引
提现任务
新手帮助
成就奖励
发帖赚币
扩散大招
元素活动
积分兑换
元素排行榜
会员排行
本月最热
本周最热
热搜榜
选择一张图片,识图会帮你找到更多相似图片,运算复杂,请耐心等待···
上一个
【双语】未来科幻走廊 室内灯光渲染教程,Octane渲染教程
下一个
【双语】Maya界面和工具的深入讲解
您需要 登录 才可以下载或查看,没有账号?注册
使用道具 举报 登录
快来发表你宝贵的意见吧!
2.5D图标-PNG
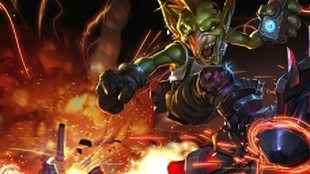
炉石传说-角色卡牌...
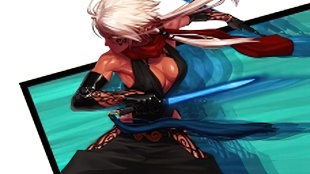
女刺客-敏捷-盗贼...
战斗机
WarSong
【神级】【钻石】【材料】,【在勇士公会获得】为微元素的发展做出过一点贡献!
【高级】【法杖】【每日激活】贡献值+1, 上限:200点贡献值【触发概率:100%】,【装备中心, 拥有超神1,花费10000元素币购买】它蕴含着无尽的光明力量,能够驱散黑暗、照亮世界。传说中,只有拥有纯洁正直之心的勇者才能够握住它。
【高级】【项链】【绝版】【每日激活】元素币+10【触发概率:100%】,【稀有装备仅通过特殊活动任务获取】被认为是诸神之间的嫉妒之果。项链蕴含无尽的黄金力量,佩戴者将拥有无敌的力量和财富。
【高级】【药水】【材料】,邀请好友加入元素完成获取此药水。目前该装备已停止发放,请等待活动复刻哦!
【超级】【美食】,达成成就【免费午餐】正确发布过30张以上的免费资源,【达到要求去勇士公会区申请获得】源自远古时代的美食之地。它由神奇的食材和秘制的酱料构成,每一口都蕴含着强大的能量和滋养。持有者食用后将获得超人般的力量和无穷的耐力,成为战场上无敌的存在,同时也能满足饥饿的心灵。
【超级】【枪系】【每日激活】元素币+10【触发概率:100%】,【在装备中心, 到达精华4,花费 100 贡献值购买】双杀由一对神兽的角制成,材质坚硬无比,能够同时发射两次致命射击,令敌人无法逃脱它的威力。
【初级】【药水】【材料】,【购买相关帖子获取】神秘粘稠液体,获得它,就可以让特效制作能力上升!
【初级】【剑系】,【在装备中心, 花费200 元素币进行购买】一把很好用的剑,虽不能削铁如泥,但上战场是标配了!
【高级】【剑系】【每日激活】元素币+15, 活跃度+10【触发概率:100%】,【在装备中心, 花费3200微金购买获得】剑身完美无瑕的光泽,象征着你的身份。
【超级】【钱币】,【在装备中心, 到达1W元素币,花费 8 贡献值购买】1W元素币的持有者,对于很多元素者来说,是一件值得骄傲的事情!这枚珍贵的金币是元素力量的象征,传承着神秘的历史与非凡的力量。
【高级】【晶石】【材料】,【可在勇士公会领取相关任务】红粉色的晶石,看着像粉钻,但又不像。
【新手】【枪系】,【在装备中心, 花费50元素币购买获得】长枪在手,英姿飒爽,突破一切阻碍。
【超级】【史莱姆】,达到要求在科技实验室自行领取。萌萌哒蓝色史莱姆宠物,奖励给乐于分享教程资源的元素勇者们~史莱姆会外出冒险加积分!多个史莱姆装备可以合作奖励会叠加!
通过了实名认证的内容创造者
建模师


 (或35余额)
 百度网盘
百度网盘


 画板
画板