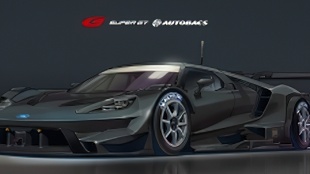
CG视频教程 [3D建模] 【Blender】Darr《Blender 3. 0 创建老爷车》(中英双字)
发布于
2020-10-13
98
0
视频教程
CG教程: 建模|雕刻 材质|节点 Blender 
语音: 英语 
字幕: 双语字幕 
清晰度: 超清 1080p+ 
版权声明: 【公共内容】

您需要 登录 才可以下载或查看,没有账号?注册

x
价格:350 元素币 百度网盘 收益:0元素币 销量:0
尊敬的游客 ,本内容需要支付后可见.
您可以[充值][发帖] [悬赏] [任务]来赚取积分。
提醒使用【余额支付】需要: ¥35 余额
英文名:Blender 3. 0 Vintage Car Creation
教程共106集,总时长18小时25分,高清视频,无素材文件。
官方简介:https://www.skillshare.com/class ... Creation/1448335897
43.png
1.jpg


\001 – 001 Course Overview.mp4
\002 – 002 Preparing the Reference Images.mp4
\003 – 003 Setting up Reference Images in Blender.mp4
\004 – 004 Beginning the Modeling.mp4
\005 – 005 Modeling the Hood.mp4
\006 – 006 Extruding the Hood Vent.mp4
\007 – 007 Using the Shrinkwrap Modifier for Smoothing.mp4
\008 – 008 Beginning the Front Fender.mp4
\009 – 009 Continuing the Fender.mp4
\010 – 010 Beginning the Side of the Car.mp4
\011 – 011 Continuing with the Side.mp4
\012 – 012 Connecting the Fender and Hood.mp4
\013 – 013 Extending the Hood to the Cab.mp4
\014 – 014 Beginning the Back of the Car.mp4
\015 – 015 Starting the Rear Fender.mp4
\016 – 016 Working on the Rear Fender.mp4
\017 – 017 Finishing the Back.mp4
\018 – 018 Creating the Exterior Panels.mp4
\019 – 019 Confroming the Front Panels.mp4
\020 – 020 Finishing Conforming the Panels.mp4
\021 – 021 Moldeling the Grill Rim.mp4
\022 – 022 Creating the Headlights.mp4
\023 – 023 Grill Rim Redux.mp4
\024 – 024 Modeling the Grill Bars and Emblem.mp4
\025 – 025 Creating the Front Bumper.mp4
\026 – 026 Modeling the Front Turn Signal.mp4
\027 – 027 Using the Boolean Modifier.mp4
\028 – 028 Using Blender’s Path Tool.mp4
\029 – 029 Creating the Windshield with NURBS Surfaces.mp4
\030 – 030 Modeling the Windshield Frame.mp4
\031 – 031 Creating the Hood Ornament.mp4
\032 – 032 Beginning the Rear Bumper.mp4
\033 – 033 Finishing the Rear Bumper.mp4
\034 – 034 Beginning the Tail Lights.mp4
\035 – 035 Finishing the Tail Lights.mp4
\036 – 036 Modeling the Rear Fender Lights.mp4
\037 – 037 Creating the License Plate Light.mp4
\038 – 038 Creating the Trunk Latch.mp4
\039 – 039 Beginning the Tires and Wheels.mp4
\040 – 040 Modeling the Hub Caps.mp4
\041 – 041 Beginning the Hub Cap Spokes.mp4
\042 – 042 Finishing the Spokes.mp4
\043 – 043 Modeling the Cab Trim.mp4
\044 – 044 Beginning the Seats.mp4
\045 – 045 Continuing the Seats.mp4
\046 – 046 Continuing the Seats.mp4
\047 – 047 Finishing the Seats.mp4
\048 – 048 Beginning the Dashboard.mp4
\049 – 049 Finishing the Dashboard Base.mp4
\050 – 050 Adding the Interior Floor.mp4
\051 – 051 Modeling the Interior Door Panel.mp4
\052 – 052 Beginning the Steering Wheel.mp4
\053 – 053 Continuing the Steering Wheel new.mp4
\054 – 054 More Work on the Steering Wheel.mp4
\055 – 055 Finishing the Steering Wheel.mp4
\056 – 056 Adding Details to the Dash.mp4
\057 – 057 Adding More Details to the Dash.mp4
\058 – 058 Modeling the AM Radio.mp4
\059 – 059 More Details to the Dashboard.mp4
\060 – 060 Beginning the Glove Compartment.mp4
\061 – 061 Finishing the Glove Compartment.mp4
\062 – 062 Modeling the Gas Pedal.mp4
\063 – 063 Using the Spin Tool.mp4
\064 – 064 Creating Details Under the Dash.mp4
\065 – 065 Modeling the Rear View Mirror.mp4
\066 – 066 Modeling the Gear Shift.mp4
\067 – 067 Creating the Door Latch.mp4
\068 – 068 Finishing the Door Latch.mp4
\069 – 069 Finishing the Interior Modeling.mp4
\070 – 070 Modeling the Oil Pan.mp4
\071 – 071 Working on the Rear Axle.mp4
\072 – 072 Coninuing the Undercarriage.mp4
\073 – 073 More Work on the Undercarriage.mp4
\074 – 074 Modeling the Wheel Wells.mp4
\075 – 075 Finishing the Undercarriage.mp4
\076 – 076 Beginning the Tire Treads.mp4
\077 – 077 Finishing the Tire Treads.mp4
\078 – 078 Adding the Side Trim.mp4
\079 – 079 Finishing the Side Trim.mp4
\080 – 080 Adding Thickness to the Car Body.mp4
\081 – 081 Adjusting the Undercarriage and Bumper Plate.mp4
\082 – 082 Final Fixes for the Tires.mp4
\083 – 083 Making More Adjustments and Fixes.mp4
\084 – 084 Finishing the Fixes and Adjustments.mp4
\085 – 085 Beginning to Add Materials.mp4
\086 – 086 Assigning Multiple Materials to an Object.mp4
\087 – 087 Adding Materials to the Tires and Wheels.mp4
\088 – 088 Adding Materials to the Interior.mp4
\089 – 089 Finishing the Chrome Material.mp4
\090 – 090 Creating Textures for the Seats.mp4
\091 – 091 Adding More Materials for the Interior.mp4
\092 – 092 Creating the Floor Texture.mp4
\093 – 093 Adding Textures to the Radio and Dials.mp4
\094 – 094 Adding the Textures for the Headlights and Emblem.mp4
\095 – 095 Making the Car Paint Material.mp4
\096 – 096 Creating a Glass Shader.mp4
\097 – 097 Adding Materials to the Tail Lights.mp4
\098 – 098 Creating the Materials for the Undercarriage.mp4
\099 – 099 Getting the Car Ready for Rendering.mp4
\100 – 100 Setting Up the Interface for Rendering.mp4
\101 – 101 Rendering Images of the Car.mp4
\102 – 102 Using Depth of Field and Glare.mp4
\103 – 103 Rendering an Animation.mp4
\104 – 104 Using the Video Sequence Editor.mp4
\105 – 105 Exporting Video File of the Animation.mp4
\106 – 106 Conclusion.mp4
\001 – 001 课程概述.mp4
\002 – 002 准备参考映像.mp4
\003 – 003 在Blender中设置参考图像.mp4
\004 – 004 开始建模.mp4
\005 – 005 引擎盖建模.mp4
\006 – 006 挤压引擎盖通风口.mp4
\007 – 007 使用收缩包装修改器进行平滑.mp4
\008 – 008 启动前挡泥板.mp4
\009 – 009 继续挡泥板.mp4
\010 – 010 从汽车侧面开始.mp4
\011 – 011 继续侧面.mp4
\012 – 012 连接挡泥板和引擎盖.mp4
\013 – 013 将引擎盖延伸到驾驶室.mp4
\014 – 014 开始汽车后部.mp4
\015 – 015 启动后挡泥板.mp4
\016 – 016 正在处理后挡泥板.mp4
\017 – 017 整理背部.mp4
\018 – 018 创建外部面板.mp4
\019 – 019 从前面板.mp4
\020 – 020 完成面板.mp4
\021 – 021 塑造格栅轮辋.mp4
\022 – 022 制造大灯.mp4
\023 – 023 格栅轮辋 Redux.mp4
\024 – 024 格栅栏和徽章建模.mp4
\025 – 025 创建前保险杠.mp4
\026 – 026 前转向信号灯建模.mp4
\027 – 027 使用布尔修饰符.mp4
\028 – 028 使用搅拌机的路径工具.mp4
\029 – 029 使用NURBS表面创建挡风玻璃.mp4
\030 – 030 挡风玻璃车架建模.mp4
\031 – 031 创建兜帽装饰.mp4
\032 – 032 启动后保险杠.mp4
\033 – 033 完成后保险杠.mp4
\034 – 034 开始尾灯.mp4
\035 – 035 完成尾灯.mp4
\036 – 036 后挡泥板灯建模.mp4
\037 – 037 创建车牌灯.mp4
\038 – 038 创建中继闩锁.mp4
\039 – 039 开始轮胎和车轮.mp4
\040 – 040 轮毂盖建模.mp4
\041 – 041 开始轮毂盖辐条.mp4
\042 – 042 完成辐条.mp4
\043 – 043 驾驶室饰件建模.mp4
\044 – 044 开始座位.mp4
\045 – 045 继续座位.mp4
\046 – 046 继续座位.mp4
\047 – 047 完成座位.mp4
\048 – 048 开始仪表板.mp4
\049 – 049 完成仪表板底座.mp4
\050 – 050 添加里面地板.mp4
\051 – 051 室内门板建模.mp4
\052 – 052 启动方向盘.mp4
\053 – 053 继续使用新方向盘.mp4
\054 – 054 方向盘上的更多工作.mp4
\055 – 055 完成方向盘.mp4
\056 – 056 向 Dash 添加详细信息.mp4
\057 – 057 向 Dash 添加更多详细信息.mp4
\058 – 058 AM 无线电建模.mp4
\059 – 059 仪表板的更多详细信息.mp4
\060 – 060 开始手套箱.mp4
\061 – 061 整理手套箱.mp4
\062 – 062 油门踏板建模.mp4
\063 – 063 使用旋转工具.mp4
\064 – 064 在破折号下创建详细信息.mp4
\065 – 065 后视镜建模.mp4
\066 – 066 换档建模.mp4
\067 – 067 创建门闩.mp4
\068 – 068 完成门闩.mp4
\069 – 069 完成室内建模.mp4
\070 – 070 油底壳建模.mp4
\071 – 071 在后桥上工作.mp4
\072 – 072 连接起落架.mp4
\073 – 073 在起落架上做更多工作.mp4
\074 – 074 轮井建模.mp4
\075 – 075 完成底盘系统.mp4
\076 – 076 开始轮胎胎面.mp4
\077 – 077 完成轮胎胎面.mp4
\078 – 078 添加侧边饰.mp4
\079 – 079 完成侧面装饰.mp4
\080 – 080 增加车身厚度.mp4
\081 – 081 调整底盘和保险杠板.mp4
\082 – 082 轮胎的最终修复.mp4
\083 – 083 进行更多调整和修复.mp4
\084 – 084 完成修复和调整.mp4
\085 – 085 开始添加材料.mp4
\086 – 086 为一个对象指定多个材质.mp4
\087 – 087 为轮胎和车轮添加材料.mp4
\088 – 088 为内饰添加材料.mp4
\089 – 089 完成铬材料.mp4
\090 – 090 为座椅创建纹理.mp4
\091 – 091 为内饰添加更多材料.mp4
\092 – 092 创建地板纹理.mp4
\093 – 093 向收音机和拨号盘添加纹理.mp4
\094 – 094 添加前大灯和徽章的纹理.mp4
\095 – 095 制造汽车油漆材料.mp4
\096 – 096 创建玻璃着色器.mp4
\097 – 097 为尾灯添加材质.mp4
\098 – 098 为底盘系统创建材质.mp4
\099 – 099 让汽车准备好渲染.mp4
\100 – 100 设置渲染接口.mp4
\101 – 101 渲染汽车的图像.mp4
\102 – 102 使用景深和眩光.mp4
\103 – 103 渲染动画.mp4
\104 – 104 使用视频序列编辑器.mp4
\105 – 105 导出动画的视频文件.mp4
\106 – 106 结论.mp4


参与人数 3 元素币 +36 活跃度 +18

本帖被以下画板推荐:

一直呆在家

使用道具 举报 登录

回复 <

快来发表你宝贵的意见吧!

菜菜鸟寒默 实名

通过了实名认证的内容创造者

绘画师

主题
3
精华
3
超神
0
扩散
0
微金
1128
智慧
1
余额
0
在线时间
21 小时

长枪 枫月药水 元素巨无霸 蓝月药水 蓝色史莱姆 长剑

快速回复 返回顶部 返回列表